Using SWT from CVS
*** NOTE: SWT has migrated its source to GIT. ***
SWT lives in Eclipse CVS at dev.eclipse.org.
- Anonymous CVS access: :pserver:anonymous@dev.eclipse.org:/cvsroot/eclipse
- Browse the CVS repository on the web
Running with SWT from CVS takes a bit of work to set up for your platform. Here is a quick guide to help you get set up.
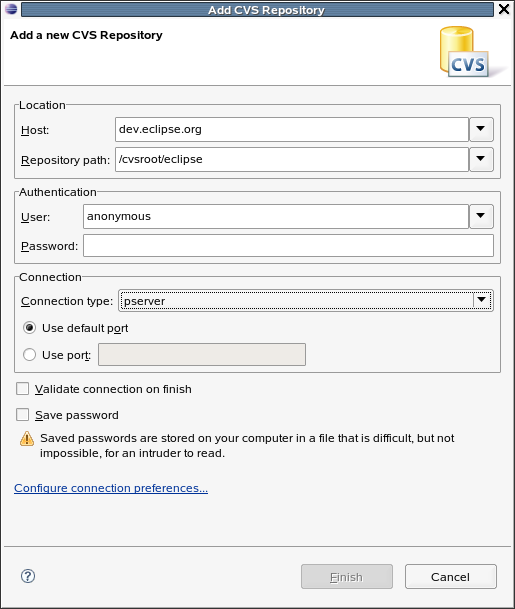
- First, set up the CVSROOT. Use File > Import... > CVS >
Projects from CVS and enter the information for the Eclipse
CVS server.
- Next, check out the org.eclipse.swt project, where all
the Java code lives, along with the correct binary package for
the DLLs from your platform.

Each platform has a module for the binaries categorized by toolkit, OS, and CPU architecture. Examples:
Windows org.eclipse.swt.win32.win32.x86 Mac OS X org.eclipse.swt.cocoa.macosx Linux GTK org.eclipse.swt.gtk.linux.x86 Linux Motif org.eclipse.swt.motif.linux.x86 You may also want to check out the org.eclipse.swt.examples and org.eclipse.swt.snippets projects.
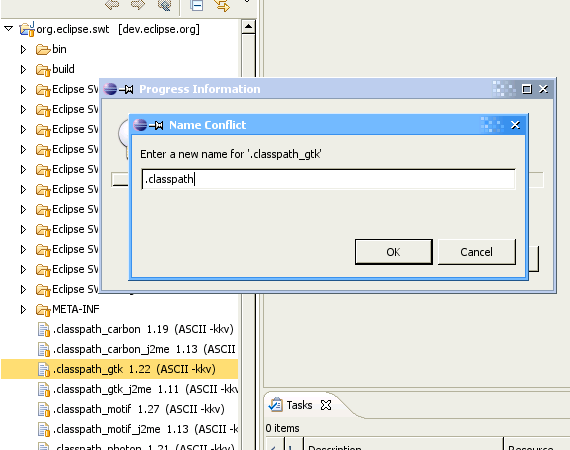
- SWT has a different Eclipse .classpath file for each platform, so we need to set up Eclipse to use the right one. To do this we first show the Navigator view (Window > Show View > Navigator).
- Next, we expand org.eclipse.swt and find the
.classpath_xxx file for our platform and copy it to a file named
.classpath.
- After changing a .classpath file, it's usually a good
idea to clean the projects that depend on it to make sure
everyone is cool.
(Note that if you are building for a 64-bit platform, there is an extra step needed. Please see this FAQ for details).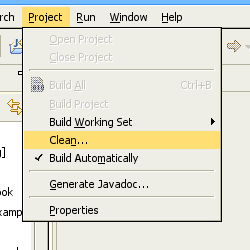
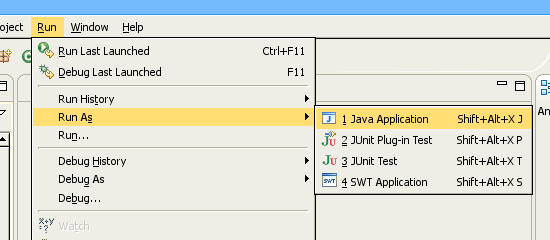
- We're ready to go! To test our checkout, let's find an SWT
application to run. How about the ControlExample.

- After we've selected the ControlExample.java file, we can run
it using Run > Run As > Java Application.
And there you go!