One task that has become a lot more complicated in CDT 3.0 is setting
the source lookup path (in situations where you are debugging an
application on a different machine than it was compiled on). I was
trying to explain the process to one of my users and realized that I
needed a lot of steps with multiple screenshots just to be able to
describe the process. I really thought I needed to send the same use
case to this list as it works very well in exposing a usabilty problem,
especially when comparing the process with how simple the same thing
was in CDT 2.1.
/Hampus Edvardsson
Setting the Source Lookup Path in CDT 3.0
Hampus Edvardsson (hampus@xxxxxxxxxxxxx)
When an executable has been compiled with debug
symbols on a
different machine than the current host, the paths to the source files
are
likely to be invalid (since this path is often an absolute path).
Instructing CDT 3.0 to look for the source files
in a
different directory than the one specified is unfortunately
ridiculously hard
(it takes a total of eight steps through four or five nestled dialog
boxes).
These steps are shown below.
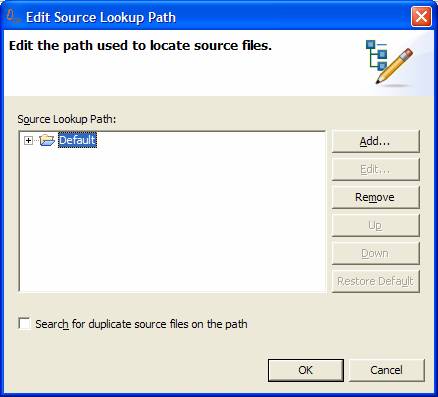
1. Press the button “Edit Source Lookup Path”,
shown in the
view where the source code is supposed to be.

2.
In
the dialog box that appears, select “Add…”.
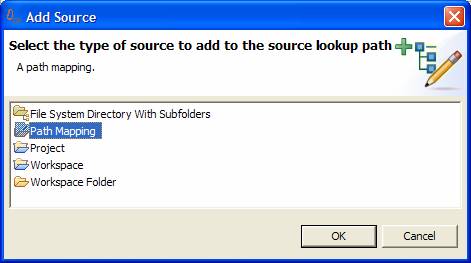
3.
In
the next dialog box, select “Path Mapping” and press OK.
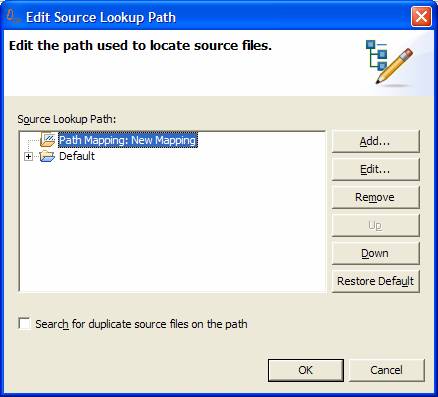
4. Now we are back in the previous dialog box,
with a newly
created “Path mapping”. Select this element and click the edit button.
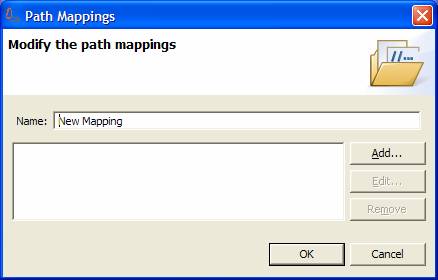
5. This will open another dialog box, where we can
name the
mapping entry. This entry turns out to not be an entry at all, but
actually a
group of path mappings. To add a path mapping to this group, press the
“Add…”
button. (The group of path mappings can also be labeled for some
reason…)
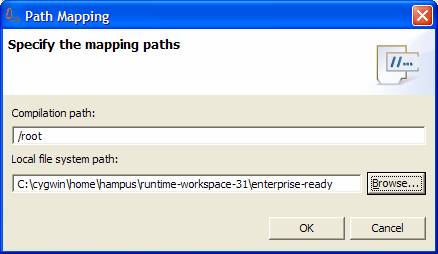
6. New we are presented with the dialog box where
we specify
the actual path mapping. In the upper text field we specify the path
that was
compiled into the executable. This is not filled in by default but left
blank
so that we must remember what the exact path was when we compiled the
executable. In this case, it was “/root”. It also allows us to specify
where we
want CDT to look for these files on the host file system.
7. We want our users to store the source code in
project
directory associated with this launch. Unfortunately, CDT here provides
a
directory browser, with the desktop as its default location, resulting
in a lot
of pointing and clicking before we have reached the directory where the
project
is stored on our hard drive. (The dialog will also not remember this
location
when opened a second time.)

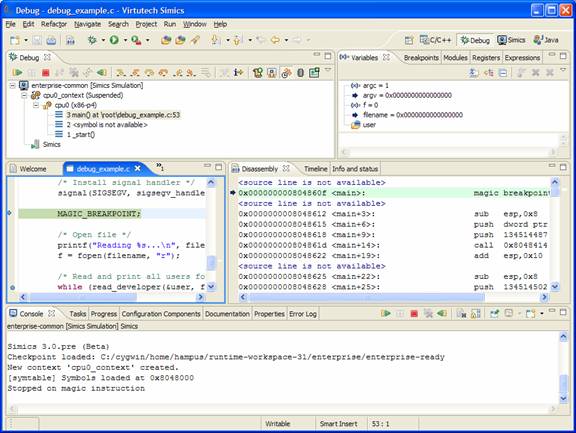
8. Now when we finally has specified the source
mapping, and
pressed OK in a total of four dialog boxes, we are returned to the main
window
again. If we managed to specify a correct path mapping, the result will
look
something like the picture below, and the current line of source code
will be
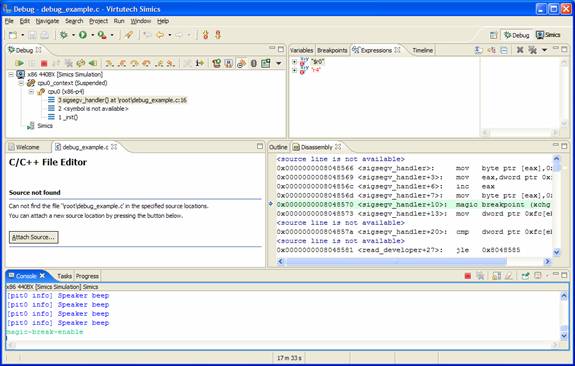
selected in the source view. If we made a mistake somewhere along this
line, we
will end up with a window looking like the one in the first view in the
beginning of this document. Then we have to figure out where we made
the
mistake and repeat (more or less) the whole process.
Setting the Source Lookup Path in CDT 2.1
Contrast the behavior described above with how CDT
2.1 works.
1.
In
CDT 2.1, a much more readably page appears in the source view when a
specified
source file could not be found. It contains the complete path of the
file it
was trying to display, as well as instructions on how to specify an
alternative
path to use instead.
2. Pressing the button, displays the following
dialog box.
In this dialog, the compiled path has already been supplied by CDT
(since it
knows exactly what it is supposed to be). The only this we have to
specify is
the path on the host where we have located the source code.
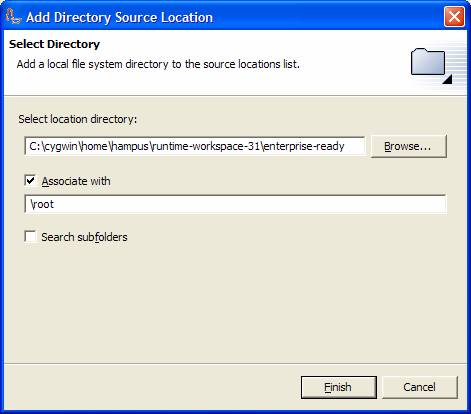
And we’re done!