Build Gradle projects with Eclipse Buildship
Introduction
Buildship is an Eclipse plugin that allows you to build applications and libraries using Gradle through your IDE.
It is actively maintained by the Gradle team, with 30 releases since the project’s inception, and is now included by default in the most popular Eclipse distributions such as “Eclipse IDE for Java EE Developers”. There are also a few popular Eclipse tools that rely on Eclipse Buildship to support Gradle-based projects, such as the Spring Tool Suite or JDT Language Server.
The basic functionality of Buildship is well-documented, but there are some cool advanced features that I would like to present in this post. Let's get started.
Project import
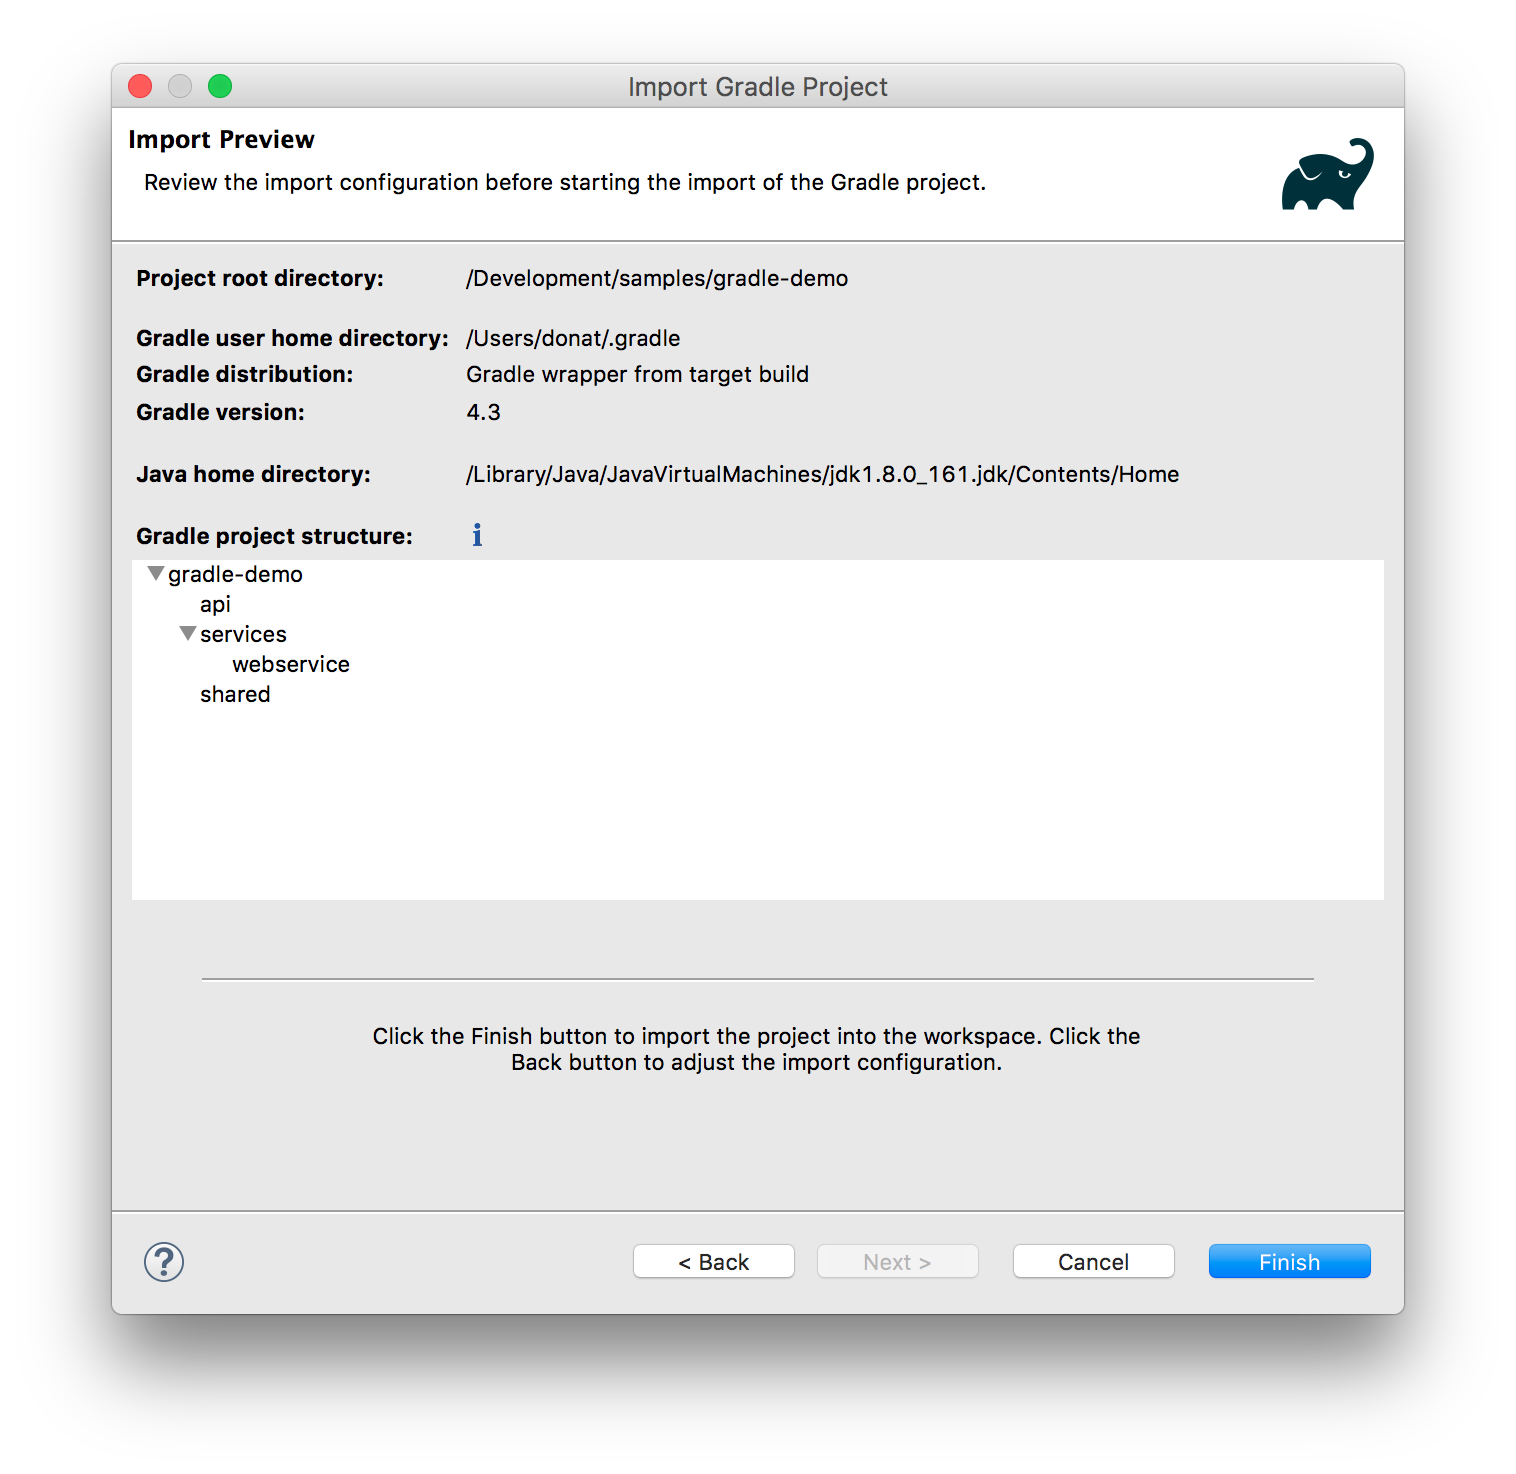
First, let’s take a look at the import wizard. On the first page of the project import dialog box you can simply select the root project, click the Finish button, and the import process starts. But did you know that you can get a preview of your project in the same wizard? Just navigate to the third page of the wizard (click the Next> button twice) to make the preview visible.
Project synchronization
Another fundamental feature is the project synchronization. When modifying the build configuration, you can apply the changes by executing the Gradle > Refresh Gradle Project command from the context menu of the project node or the build script editor. Project synchronization even respects the customizations done in Gradle eclipse plugin configuration.
For instance, you can use this to define a custom name for your projects. It might come handy if other workspace project names overlap with the ones in your Gradle build. To do that, just paste the snippet below into your build script.
apply plugin: 'eclipse'

eclipse {
    project {
        name = 'custom-project-name'
    }
}
There are some cases where you might want to modify the classpath entries that Gradle auto-generates for you. For those times, you can add, remove or modify entries through eclipse.classpath.file.whenMerged. The example below shows how you can make the Eclipse compiler ignore optional warnings.
apply plugin: 'java'
apply plugin: 'eclipse'

eclipse {
    classpath {
      file {
            whenMerged {
                def source = entries.find { it.path == 'src/main/java' }
                source.entryAttributes['ignore_optional_problems'] = 'true'
            }
        }
    }
}
You can learn more about configuring the Gradle Eclipse integration through the eclipse plugin DSL.
More examples on the classpath customization are available here.
Tasks view and task execution
In the Eclipse IDE, you can execute tasks from the Gradle Tasks view. The functionality is simple, yet there are a couple of things that might be useful to know. For instance, you can filter the content with the view's content with the corresponding action from the toolbar.
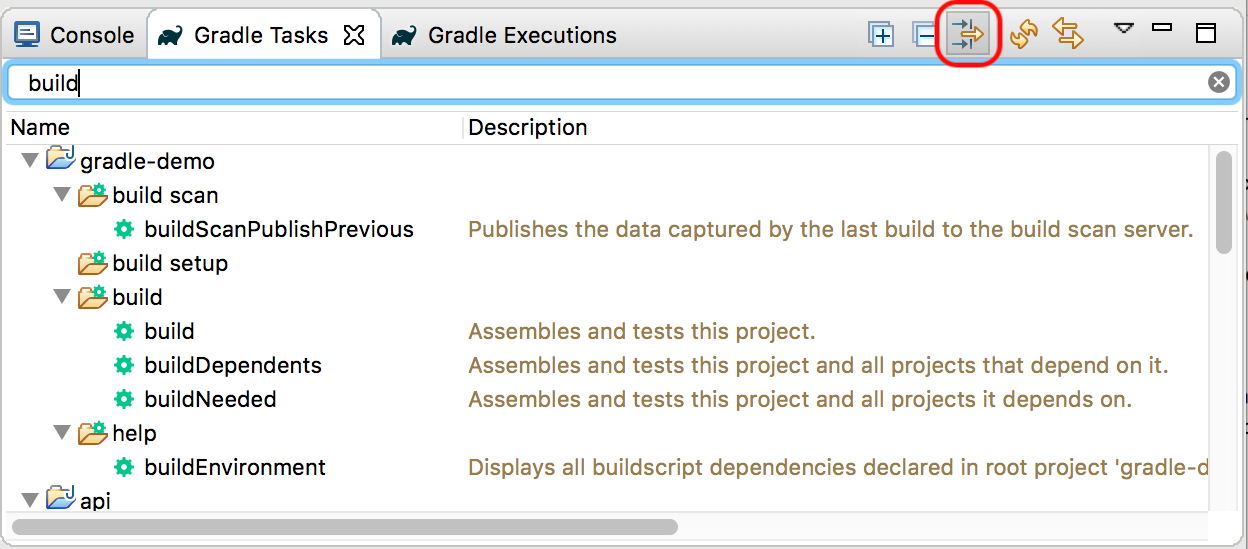
The other thing is that the view has a toolbar, which offers a filtering and grouping options.
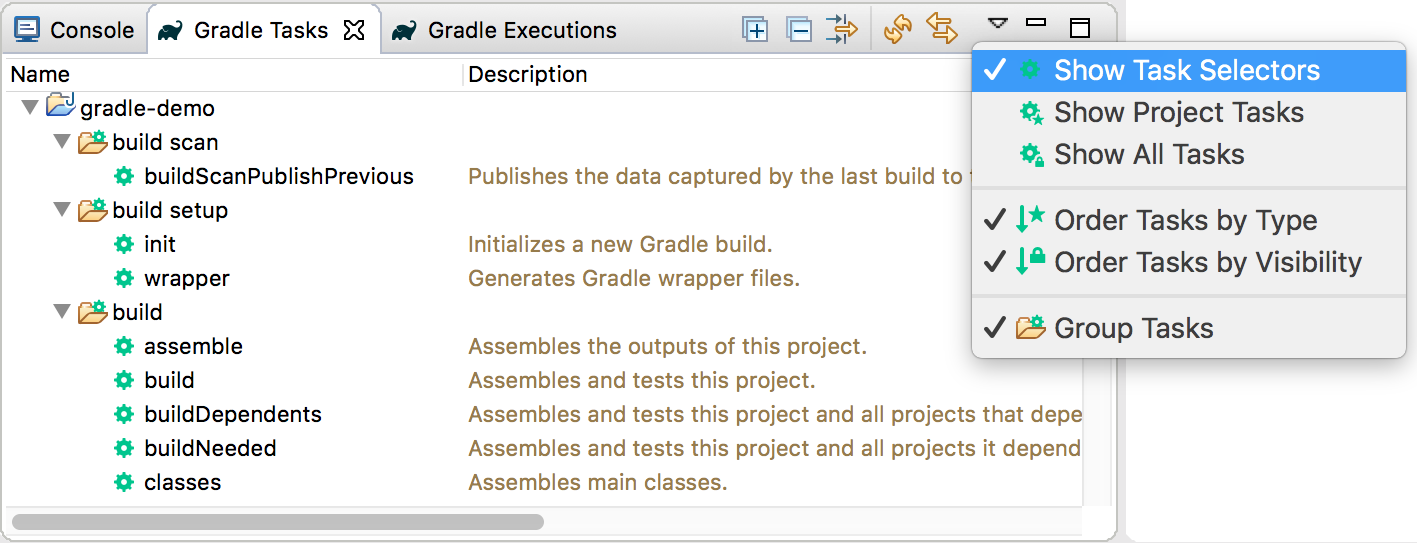
Regarding the task types, there are 3 options: show the task selectors, the project tasks, and all tasks. A task selector executes a task on the target project and on all subprojects that have the same task. On the command-line, the same thing happens when you run gradle build. A project task works on the target project only. This corresponds to the gradle :subproject:build command. The "Show all tasks" option makes the private tasks visible. The only particularity of a private task is that it has no group defined. You can list the private tasks by executing gradle tasks --all.
Build scans support
A build scan is a shareable and centralized record of a build. It is great tool analyze and share what happened during a Gradle execution. Since version 2.1, Buildship provides support for build scans.
Automatic build scan publishing can be enabled in the preferences for a project or the entire workspace. If set, the --scan argument is automatically used for each build.

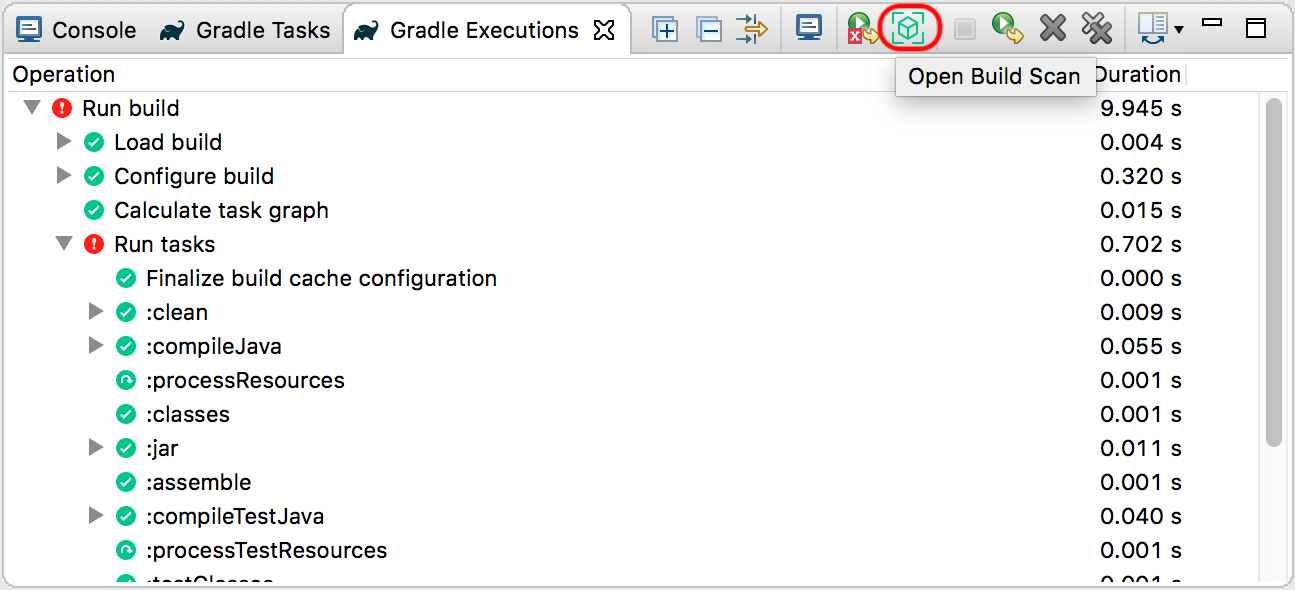
If a build scan is published during the build then the Open Build Scan action will be enabled on the Gradle Executions view toolbar. Clicking on it will open the scan in the browser.
Classpath separation
Gradle provides a fine-grained classpath separation when building a Java project. Each project has a collection of source sets, which are the sources that are built together. A source set defines different classpaths for compilation and execution of the code. These classpaths are fully user-configurable.
The Eclipse IDE defines one classpath per project, which means that mapping the Gradle source sets is challenging. Prior versions of Buildship ignored the problem altogether and merged all source sets into one classpath. This was insufficient for application frameworks like Spring Boot, where the configuration is loaded from the classpath.
Buildship 2.2 introduced a runtime classpath separation that solves the majority of use cases. It keeps track of which source folders and dependencies belong to what source sets and filters the runtime classpath accordingly. So, when you launch a Java application from src/main/java then the classes compiled from /src/test/java and the test dependencies won't be available.
This functionality works automatically. Just make sure that you have Buildship 2.2 installed, and your project uses Gradle 3.4 or newer.
Execute and rerun tests
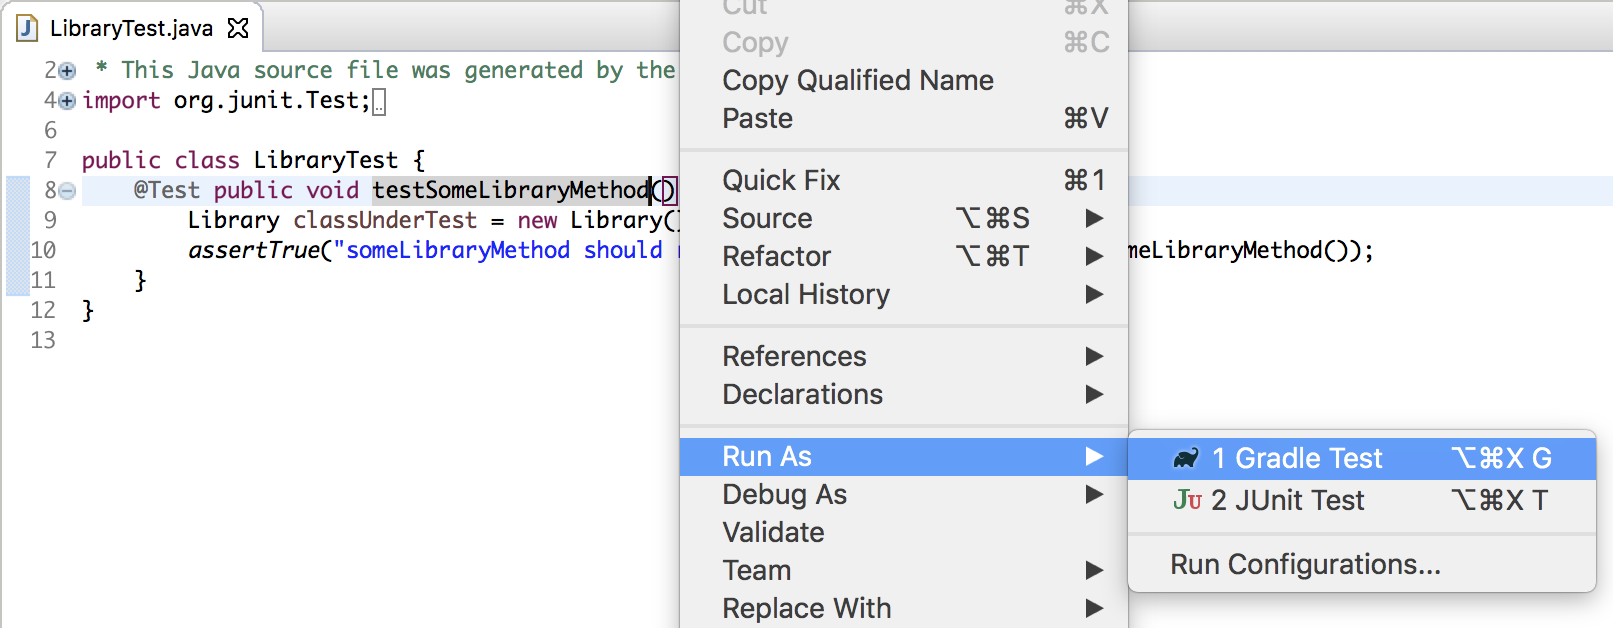
One popular way to execute a test is to double-click on the test task in the Tasks view, but there are ways run a subset of tests to get much faster feedback. You can run a single test class or method right from the editor. Just select the desired class or method and execute Run.. > Gradle Test command from the context menu. The same context menu element is available in the Outline view.
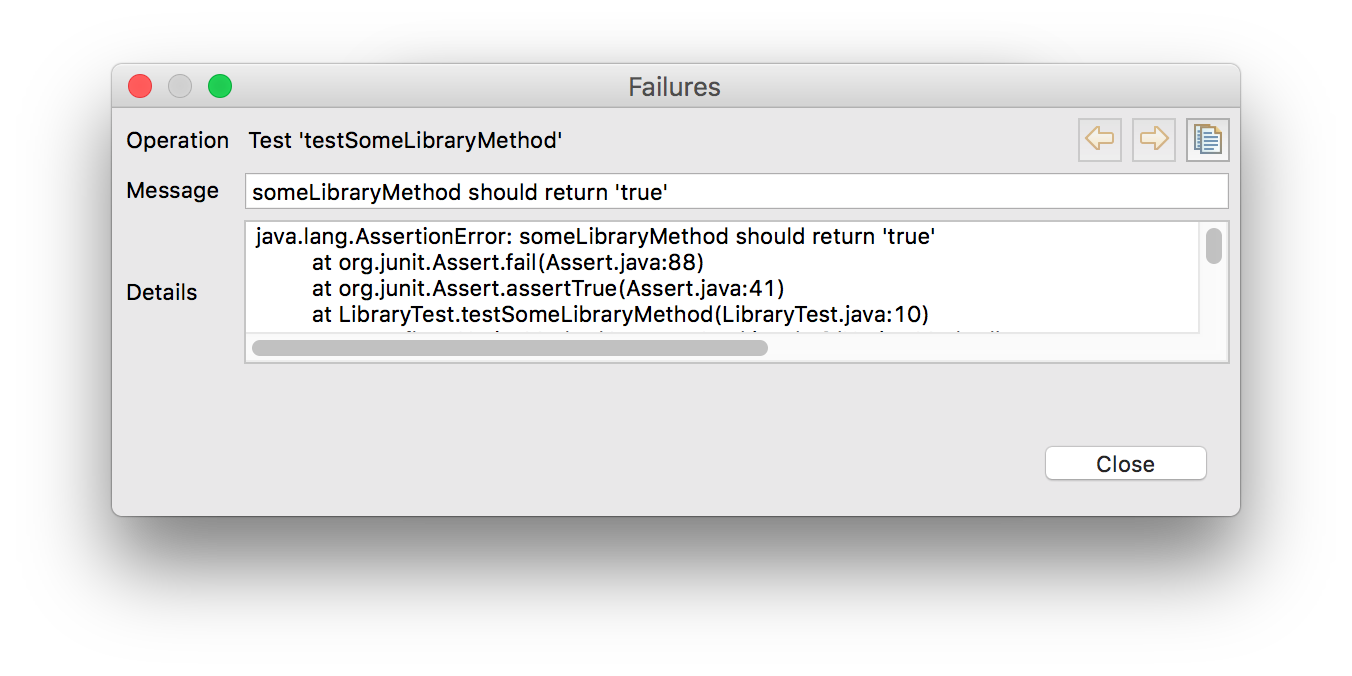
When a test fails, the error dialog shows the details of the failure. If you want to revisit the problem, you can either check the console output or find the same information via the Executions view. Just right-click on the failed test case node and select Show failures. You can check the same thing on the :test node. If a test result report is generated then a link to it will show up in the dialog.
From the same menu, you can open the test sources as well, which makes it easier to navigate between the Executions view and the source editor. There’s also a context menu option to let you re-run one chosen test.
Get in touch
Buildship is an open project with an active and welcoming community around it. If you have something to share — be it a bug report, a code change, or just a cool idea — there are several ways to get in touch.
Buildship development is coordinated on GitHub, using a ZenHub board. You can file new issues, add your 👍 to existing ones to help us prioritize, or submit pull requests to the project there. Talk to us on the Gradle forums if you want to take on a bigger task; a welcoming community is waiting to help you there.
You can get updates on Buildship development from the Gradle Newsletter and the Gradle Blog.
About the Author