Scalable Open APIs with Eclipse Vert.x
The HTTP/2 protocol is slowly but surely eating market share of the public web and if you are browsing a website proxied by a CDN (like the https://vertx.io website) with a modern browser, there is a high chance that your browser and the web server are talking with HTTP/2.
HTTP/1 was designed more than 20 years ago to render very simple web pages. Since then, the complexity of web pages has exploded, and web browsers have had to develop a variety of techniques to work around HTTP/1’s limitations; managing impressive performance that keeps load times reasonable, even for complex pages.
HTTP/2 was introduced a few years ago as a better transport for HTTP requests and responses. It does not actually redefine how client and server interact, but instead tries to optimize the data exchange in the most efficient possible fashion.
Web APIs can also benefit from the improvements provided by HTTP/2, whether it is a publicly hosted API endpoint or private interactions between microservices in the same data center.
A multiplexed protocol
If you need to know a single thing about HTTP/2, it is certainly that HTTP/2 is a multiplexed protocol.
An HTTP/1 connection can only transport one request / response at a time. Of course, connections can be reused to avoid the creation cost of the connection, but when the client needs to achieve simultaneously several requests to the same server, it has no choice to open several connections; one for each request.

In addition, the client has to wait until it receives the response, with the connection remaining unused during the service time of the server. While it can be acceptable in many situations, it is certainly a very poor usage of the connection which is ultimately a resource cost for the client, the server, and the intermediaries.
HTTP/2 is a multiplexed protocol: multiplexed means that a single connection can transport multiple requests and responses simultaneously between the client and the server.

Let’s have look at the benefits of using HTTP/2.
Better capacity planning
The most important configuration aspect of non-multiplexed clients is to get the number of connections for the client right. A too low value creates unnecessary waiting for the client which leads to higher response times.
Conversely, HTTP/2 uses a single connection and the number of requests is actually defined by the server: the server tells the client how many requests it can handle simultaneously; this magic number is called the connection concurrency.
Better concurrency control
The server defining the concurrency gives the unique opportunity for the server to size the value according to a variety of criteria, such as the client QoS or the actual server resources.
The concurrency value is initially sent by the server when the connection is created and this value can be updated whenever the server needs to, e.g when the server has resources scaling down it can notify the client with a lower concurrency.
Better latency
The connection pool size has a direct impact on application performance and QoS: when the value is too low it creates unnecessary waiting on the client which results in higher service time from the perspective of the client.
With HTTP/2 server controlled concurrency, the client always uses optimal concurrency according to the server’s capacity. When the client is an intermediary like an API gateway (a glorified HTTP reverse proxy) this results in lower response times at the edge.
What is Eclipse Vert.x ?
Eclipse Vert.x is a toolkit to build distributed reactive systems on the top of the Java Virtual Machine using an asynchronous and non-blocking development model. As a toolkit, Vert.x can be used in many contexts: in a standalone application or embedded in a Spring application.
Vert.x and its ecosystem are just jar files used as any other library: just place them in your classpath and you are done.
HTTP/2 with Eclipse Vert.x
Vert.x supports HTTP/2 for server and client since the version 3.3 with a variety of options:
- The h2 protocol:HTTP/2 over TLS sockets
- The h2c with prior knowledge protocol: HTTP/2 over plain sockets
- The h2c upgrade protocol: HTTP/1.1 request upgraded to the HTTP/2 protocol
Creating an HTTP/2 server with Vert.x is very simple
public class Http2Server {

 public static void main(String[] args) {

   // Create a Vert.x instance
   Vertx vertx = Vertx.vertx();

   // Generate the certificate for https
   SelfSignedCertificate cert = SelfSignedCertificate.create();

   // Start an HTTP/2 server that prints hello world!
   vertx.createHttpServer(new HttpServerOptions()
       .setSsl(true)
       .setUseAlpn(true)
       .setKeyCertOptions(cert.keyCertOptions())
       .setPort(8443))
       .requestHandler(request -> {
         request.response().end("Hello World");
       }).listen();
  }
}
We chose to use the h2 protocol for our server and we need to configure the TLS layer accordingly:
- The SSL is set along with the usage of ALPN - ALPN is a TLS extension used by the client and the server to negotiate the usage of h2
- A self-signed certificate is generated on the fly with the
SelfSignedCertificateclass and set on options for the server
Contract First APIs Development
When you need to develop a Web API and want high productivity you might want to consider OpenAPI.
OpenAPI is an open standard that empowers developers to formally document web APIs. It provides a document and schema-centric workflow for creating Web APIs. You can adopt the Contract-First approach, enabling teams to deeply connect design and implementation phases of your Web APIs development.
You can document every aspect of your endpoints: the request parameters, the request body, the different response bodies, the security requirements and so on.
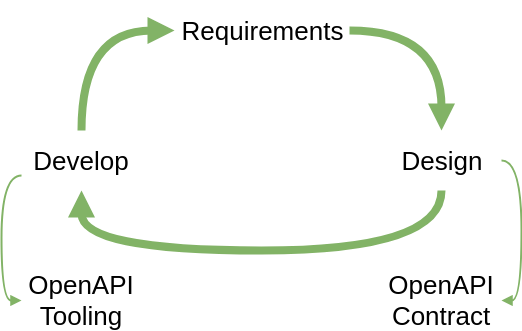
With this approach, you create an OpenAPI contract during the design phase and you reuse it during the implementation phase using specific OpenAPI tooling. You can even go beyond that and manage every part of the lifecycle of your product.
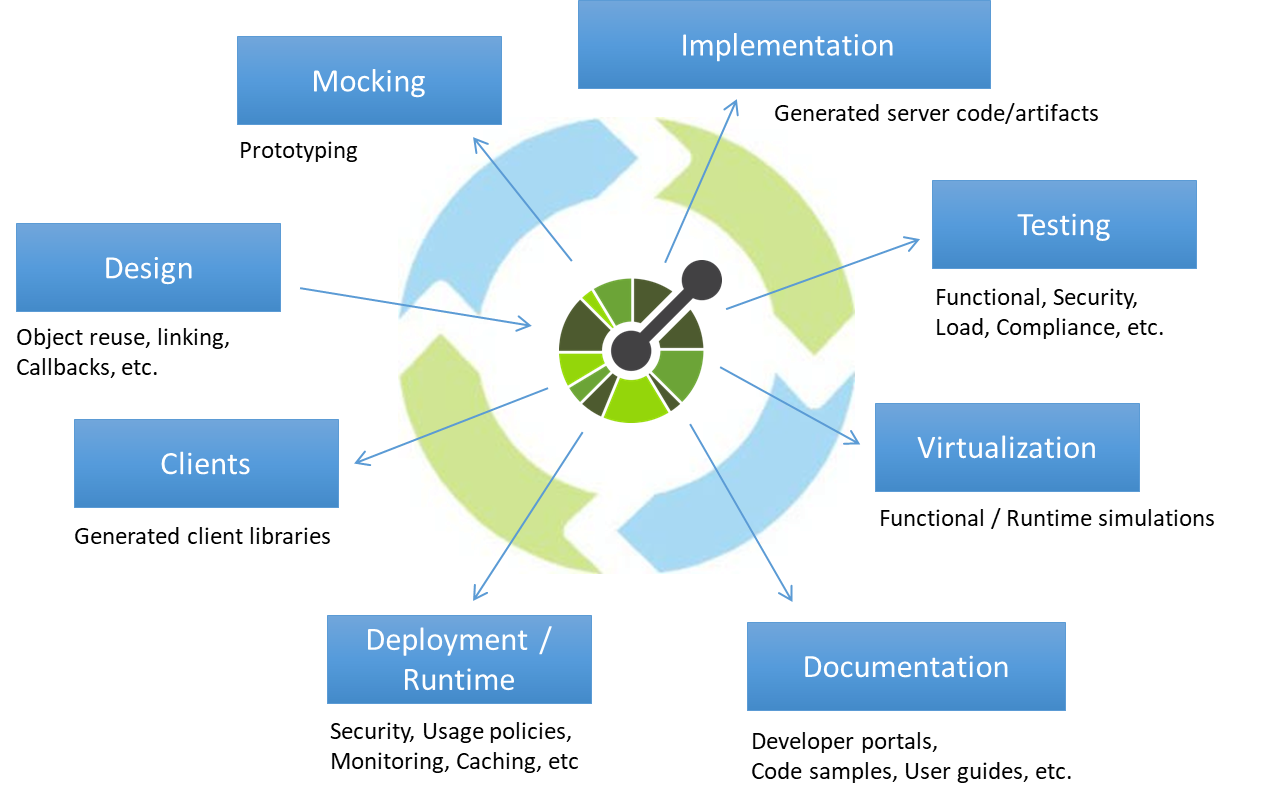
For more info give a look at OpenAPI API Development.
Vert.x meets OpenAPI
In this article, we will implement an API for managing users based on a simple OpenAPI contract. The document is in YAML format and is very human readable; you can create such documents easily with a tool, for this example we used Apicur.io Studio.
---
openapi: 3.0.0
info:
 title: Users API
 description: An API for managing users
 version: 1.0.0
paths:
 /users:
   get:
     summary: All users
     operationId: listUsers
     description: List all users
     responses:
       200:
         description: Returns the list of all users
         content:
           application/json:
             schema:
               type: array
               items:
                 $ref: '#/components/schemas/User'
   post:
     summary: Creates a user
     operationId: addUser
     requestBody:
       content:
         application/json:
           schema:
             $ref: '#/components/schemas/User'
       required: true
     responses:
       200:
         description: A user was created successfully
         content:
           application/json:
             schema:
               type: string
components:
 schemas:
   User:
     required:
     - firstName
     properties:
       firstName:
         type: string
       lastName:
         type: string
Now let’s see how we can implement a web service for this API with Vert.x.
Since version 3.5, Vert.x provides the vertx-web-api-contract component that creates a Vert.x Web Router. The main entry point is the router factory that performs two important things:
First, the router factory ensures that every request to the API conforms to the OpenAPI contract such as parsing, validating the HTTP request body, path, and query. This part is transparent and happens before the API is called.
Then the router factory maps the OpenAPI endpoint definitions to the service implementation we create: Vert.x Web API Contracts allow us to mount operations with handlers, which are simple Java lambdas that will react to an event you can handle in your code.
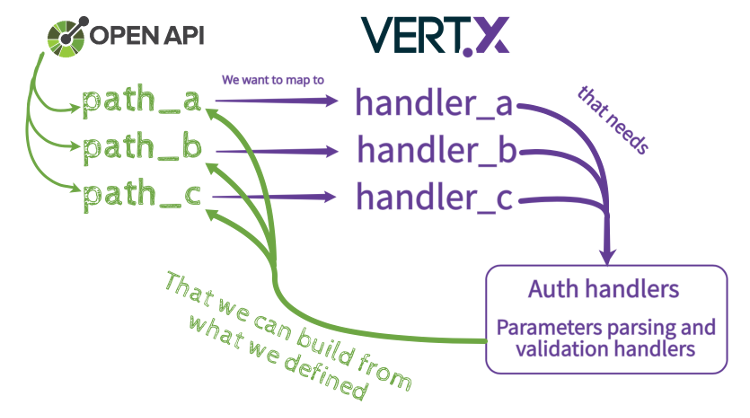
This factory also helps you to mount the right auth handlers, to mount the right failure handlers for validation and so on.
The contract defines two operations for an API exposed on the /users URL
- GET : list all users in JSON format - the
listUsersoperation - POST : inserts a new user in JSON format and returns the user identifier - the addUser operation
In Vert.x, you map each operation to a handler that processes the request and produces a response.
The listUsers operation
For the sake of simplicity, we implemented the users as a single in-memory list of users, obviously a real application would instead use a persistent storage.
void listUsers(RoutingContext routingContext) {
  // Returns the list of users encoded to a JSON array
  routingContext
     .response()
     .setStatusCode(200)
     .end(users.encode());
}
The implementation uses the RoutingContext which is provided by Vert.x Web, among other things this context provides the current HTTP response:
Upon a successful GET request, listUsers returns a JSON encoded array of a schema named User; representing all of the users in the system.
Schemas are effectively data types, and allow us to describe the format of inputs and outputs in our APIs. In this instance, a reference ($ref) is used, allowing us to reuse our Schema many times without repetition.
If you know JSON Schema, then many of the properties will be familiar, allowing for the definition of types, formats, lengths, patterns, and myriad other elements.
The addUser operation
For the addUser implementation, we need to use the parameters parsed by the API that gives us the JSON object representing the user.
void addUser(RoutingContext routingContext) {

  // Get the parsed parameters
  RequestParameters params = routingContext.get("parsedParameters");

  // We get an user JSON object validated by Vert.x Open API validator
  JsonObject user = params.body().getJsonObject();

  // Generate a user id
  String userId = "" + users.size();

  // Add the user to the users list
  users.add(user);

  // Send the user id as JSON response
  routingContext
     .response()
     .setStatusCode(200)
     .end(userId);
}
The addUser operation accepts a JSON encoded user, as defined in our User schema, returning a string containing the newly created user’s unique ID upon success.
We retrieve all of the relevant data from the RoutingContext, including the body, which is conveniently available as a JsonObject, and store it our users list.
Handily, much of the input validation can be performed on our behalf by Vert.x, which ensures the incoming object conforms to our OpenAPI definition. This means that, for example, all required fields will be present and of the correct type when our handler is executed. The validator will validate request body but also take care of deserializing and validating the query, path, cookie and header parameters, and Vert.x Web Open API does the heaving lifting for you, providing you the guarantee that the request you receive conforms to the defined contract.
Final steps
Now we have all the parts of our small application, we can wire them together.
// Start creating the router factory from openapi.yaml
OpenAPI3RouterFactory.create(vertx, "openapi.yaml", ar -> {

  // The router factory instantiation could fail
  if (ar.succeeded()) {
    OpenAPI3RouterFactory factory = ar.result();

    // Now you can use the factory to mount map endpoints to Vert.x handlers
    factory.addHandlerByOperationId("listUsers", this::listUsers);
    factory.addHandlerByOperationId("addUser", this::addUser);

    // Build the router with factory.getRouter()
    Router router = factory.getRouter();

    // Generate the certificate for https
    SelfSignedCertificate cert = SelfSignedCertificate.create();

    // Start the HTTP/2 server with the OpenAPI router
    vertx.createHttpServer(new HttpServerOptions()
       .setSsl(true)
       .setUseAlpn(true)
       .setKeyCertOptions(cert.keyCertOptions())
       .setPort(8443))
       .requestHandler(router::accept)
       .listen();
  }
});
This code is executed during the start of the application in several steps:
- The first step is the creation of the Vert.x Web router from the openapi.yaml file
- After the router is created, we map the
listUserandaddUsermethods to the corresponding API operations - Finally the HTTP/2 server is started
Conclusion
In this article, we have seen how OpenAPI’s Contract First approach can be effectively implemented with Vert.x and deliver a highly scalable implementation. If you are interested in HTTP/2 performance you can watch this presentation that explains more in-depth the technology. The entire source code for this article is shared on GitHub.
For further details about Vert.x and how you can build your next application with it, check http://vertx.io
See you soon on our Gitter channel!
About the Authors