Neon and Node.js: A magical friendship!
Node.js is the world’s fastest growing open source platform with over 3.5 million users and an annual growth rate of 100 percent. It is used for web applications, IoT, mobile, enterprise application development and microservice architectures. With the creation of the Node.js Foundation and adoption amongst several companies the future of the platform is bright and clear. This is exactly why adding Node.js support to JSDT was the next obvious step.

Pre-requirements
The following software must be pre-installed:
TIP: Installation instructions for Node.js and npm can be found here.
Node.js runtime definition
By default, the Node.js launch configuration will try to use the system-wide Node.js installation which is automatically identified on workbench startup.
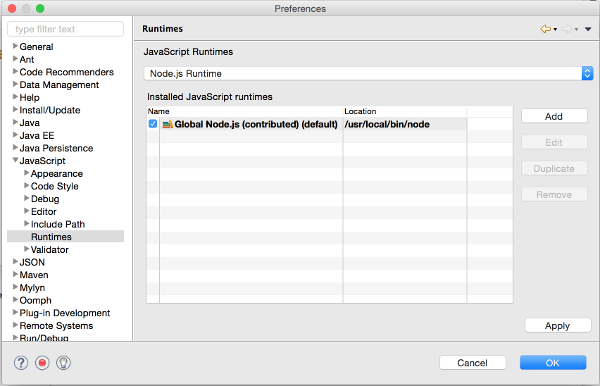
However, it is also posible to define customized Node.js binary paths, switch the Node.js used by default to run or debug applications and fully control the Node.js runtimes available in the workspace. To do that, navigate to Eclipse Preferences → JavaScript → Runtimes, where the following dialog will appear:
The identified global Node.js (if there is one) will be listed there, however you can use the buttons on the right side to work with runtimes as follow:
- Add: Provide the definition of a new Node.js installation.
- Edit: Modify an existing Node.js runtime definition. For non-user defined runtimes this will show the runtime settings in read-only mode.
- Duplicate: Create a copy of an existing definition of a Node.js runtime. This is specially useful if you want to run the same installation with different runtime arguments.
- Remove: Delete an existing runtime definition. Only available for user-defined Node.js runtimes.
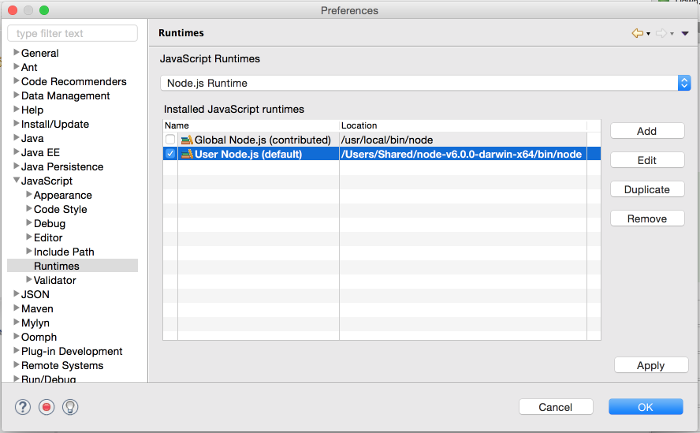
When there are multiple Node.js installations defined, it is possible to switch the default one used to run the workbench Node.js applications. This can be achieved by clicking on the checkbox at the left of the desired installation:
NOTE: This change will affect all Node.js launch configurations since this is a workbench-wide setting.
Quick Start Guide
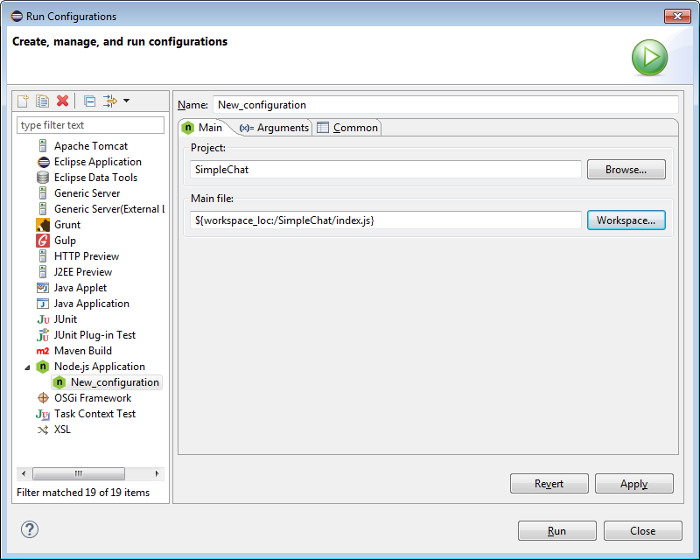
Running and debugging Node.js applications is pretty straightforward. In order to run/debug a Node.js app you need to select Run → Run / Debug Configurations… and double click Node.js Application. This will create a new Node.js Application launch configuration where you need to specify a project and a main file to be run / debugged:
Optionally in Arguments tab you can specify Node arguments, Application arguments and the working directory from which the Node.js application will be run / debugged:
After pressing Run / Debug you can see application's output in the Console view and / or debug your app in the Debug perspective.
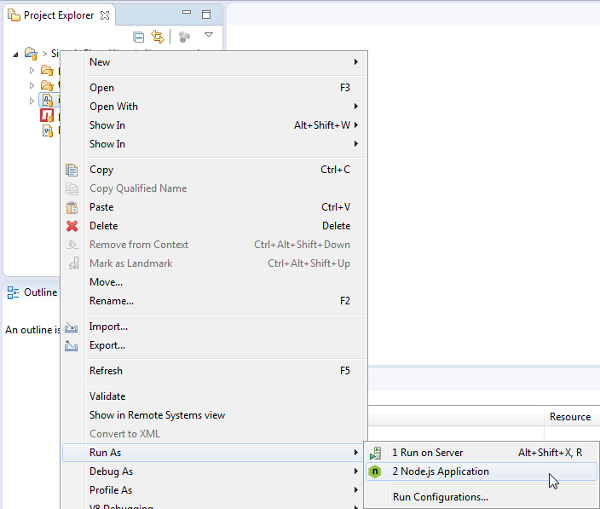
NOTE: Node.js Application Launch shortcut will be availbale for projects containing apackage.jsonfile or a .js file that is not inbower_componentornode_modulesfolder. To use the shortcut just right click on the project / .js file → Run/Debug As → Node.js Application.
In order to debug the application right click on the project / .js file → Debug As → Node.js Application.

While debugging, all JavaScript variables will be available in the Variables view:

Hovering over variables in the editor is also supported:

If you want to change the code during debug session just save the file with new changes, right click on it → V8 Debugging → Push Source Changes to VM:
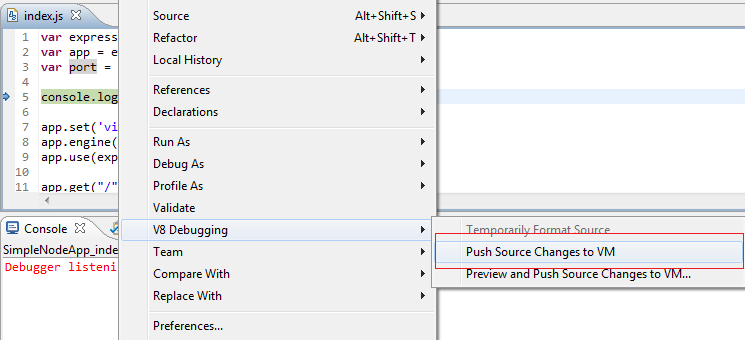
After that new changes will be applied and available in the debug session.
Demo
Here is a short demo video covering Node.js debugger functionality:
How to give it a go?
Node.js tools are available via Eclipse IDE for Java EE Developers / Eclipse IDE for JavaScript and Web Developers
developer builds before the official Eclipse Neon release.
About the Authors


-Run_Configurations_small.png)
