Using Mylyn with Git, Gerrit and Hudson
With the arrival of the Kepler release it’s time for a fresh look at the how the latest Eclipse tooling makes contributing to Eclipse easier and more fun than ever. Read on for a step-by-step guide how to setup a workspace for contributing changes to Eclipse using Git, Gerrit and Hudson.
Registering an Eclipse.org Account
Before we can get started we need to create an account on Eclipse.org.
- Register
an account on Eclipse.org
- This account is used to access the Eclipse web properties such as the Wiki, Bugzilla as well as the code review system Gerrit. In order to contribute source code we need to review and sign the Eclipse.org Contributor License Agreement and setup our account in Gerrit.
- Login to the Eclipse projects forge and complete the Contributor License Agreement
- Login to Gerrit and define a username
- Upload your public ssh-key to Gerrit for authentication
Installing the Tools
All the tools we need are conveniently available as part of the Eclipse Kepler RCP and RAP Developers package. We can also install the tools from their respective p2 repositories into any Eclipse instance using Install New Software from the Help menu:
- EGit p2 repository -
http://download.eclipse.org/egit/updates
- Eclipse Git Team Provider
- Task Focused Interface for Eclipse Git Team Provider
- Mylyn p2 repository -
http://download.eclipse.org/mylyn/latest
- Mylyn Tasks Connector: Bugzilla
- Mylyn Context Connector: Eclipse IDE
- Mylyn Builds Connector: Hudson/Jenkins
- Mylyn Reviews Connector: Gerrit
- Mylyn Version Connector: Git
Some projects release frequently so installing directly from the project repositories has the benefit of getting the latest version. This tutorial is based on Mylyn 3.9.1 (Kepler SR1) which is available from the repository above.
Overview
Throughout the tutorial we’ll follow the typical steps for submitting a contribution to Eclipse.org. We’ll be using the Mylyn project as an example but the process is similar for most Eclipse projects:
- Querying the Eclipse.org Bugzilla for tasks
- Activating a Bugzilla task
- Committing and pushing a change to Git
- Monitoring the triggered build on Hudson
- Completing the resulting Gerrit code review
We can complete the entire process from within the Eclipse IDE using the Eclipse tools provided by the Eclipse platform, EGit and Mylyn.
Querying Bugzilla
As a first step, we will look for a task in Bugzilla to work on. All
Eclipse project use Bugzilla to track defects and requests for
enhancements so it’s a good place to start. To make tasks from
Bugzilla available in Eclipse we open the Task List view
which is provided by Mylyn and right click to select New > Query
from the context menu. The Eclipse.org Bugzilla repository is
already pre-configured so we can select it and advance to the next
page where we choose Create query using form. On the form
page we enter a title and select Mylyn Tasks under Product
and enter helpwanted under Keywords.
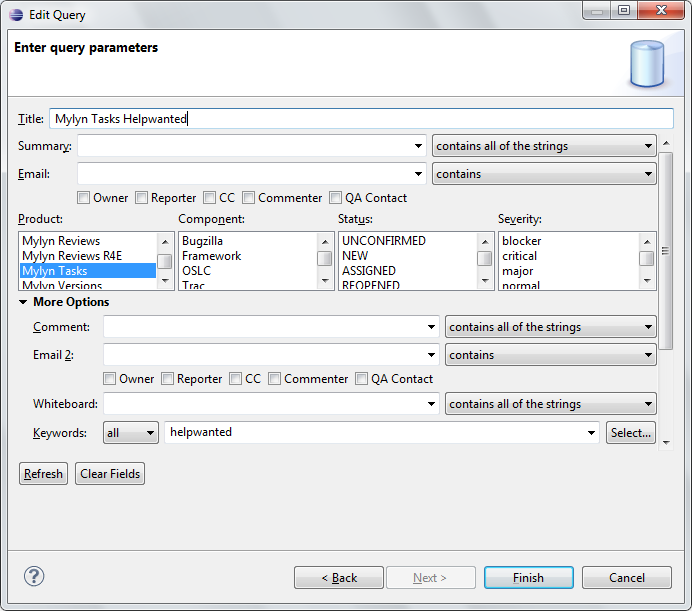
Queries are a personalized view of Bugzilla. They bring tasks we are interested in into the IDE and enable us to work with them. The query we created adds all tasks for the Mylyn Tasks project to the Task List that have been flagged by committers indicating that help from the community is desired. For this tutorial, we choose bug 325673 which is about changing the default summary when creating new tasks with Mylyn but we could have picked any open task. We double click the task in the task list which opens a rich editor where we can review the description, comments, attachments and other details.
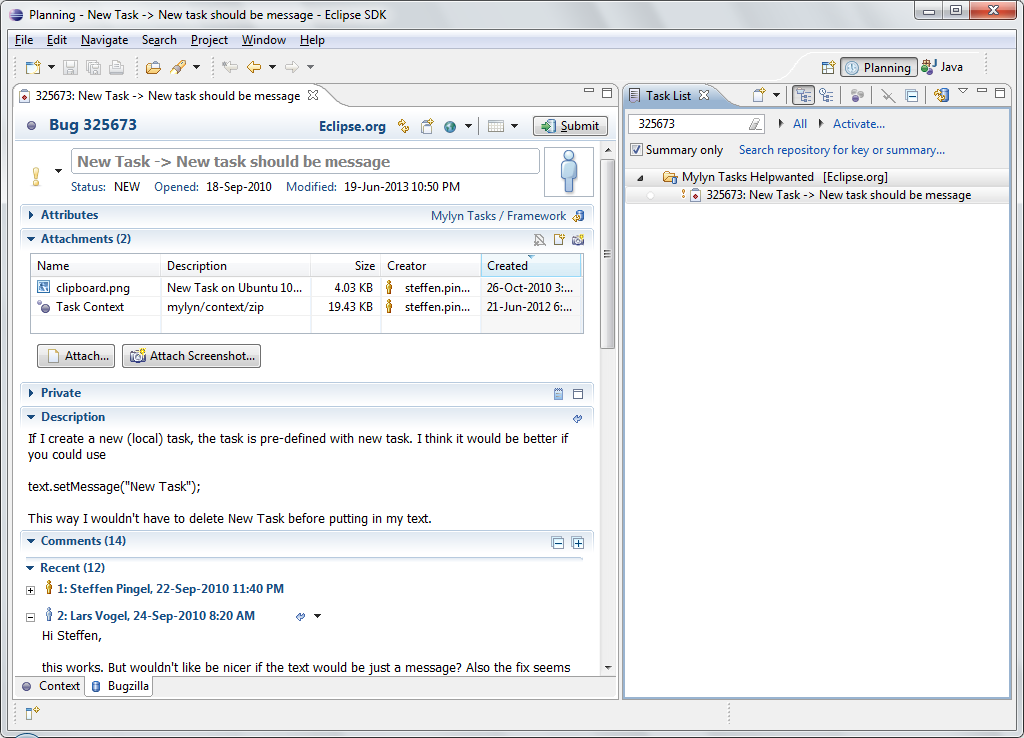
It’s good practice to state intention on a bug before starting to work on it to make others aware of our activity. In order to submit tasks we have to enter our account credentials by clicking the Eclipse.org link in the header of the Task Editor.
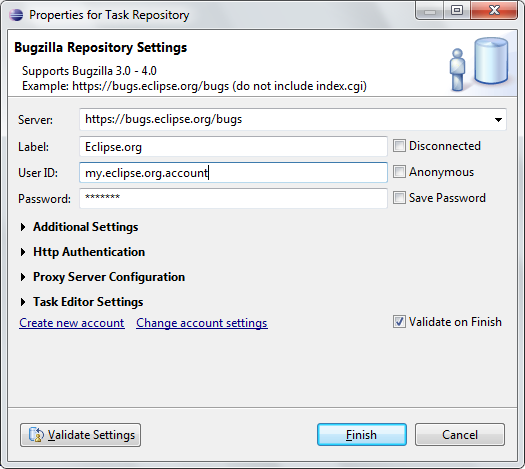
We can then refresh the task in the editor by clicking the Synchronize Incoming Changes button in the editor toolbar on the top right, enter a comment and submit our change.
Getting Source Code
Before we can start working on the task that we selected we need to get the source code. The Mylyn Tasks source code is hosted in a Git repository and managed by Gerrit.
To connect to the Eclipse.org Gerrit server we go back to the Task List and create another query for code reviews. We right click and select New > Query again. This time we have to use Add Task Repository and select Gerrit Code Review from the list. The server drop-down offers Eclipse.org Reviews as a template or we can enter https://git.eclipse.org/r as the server location. We also need to uncheck Anonymous and enter our Eclipse.org credentials.
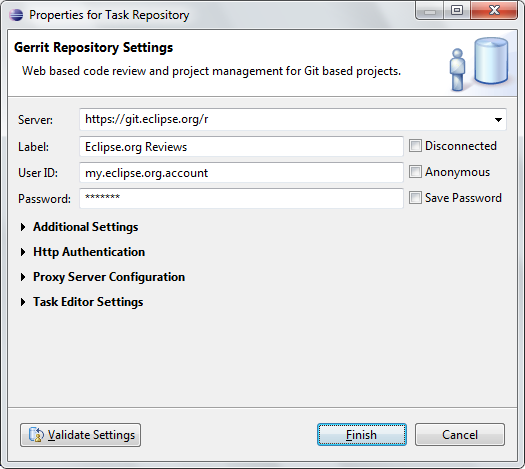
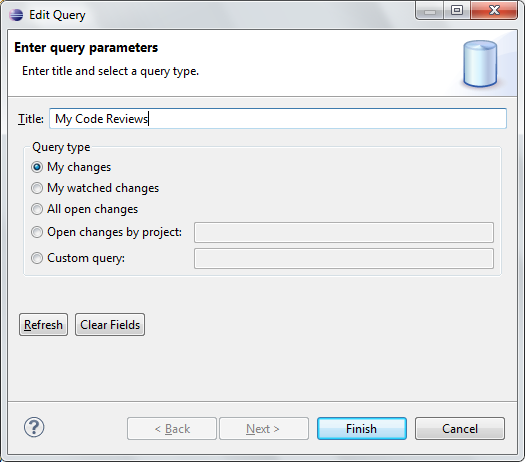
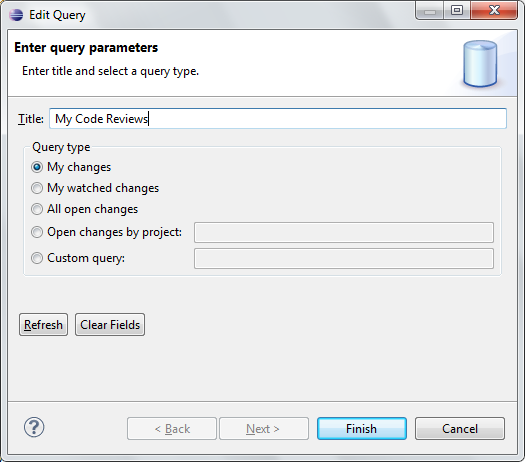
Back in the query dialog we enter a title and leave the default My changes selected. The query in the Task List will bring in our code reviews. If we haven’t submitted any code reviews, yet, it will remain empty initially.
The next step is to import source code from Gerrit. Under File > Import we select Projects from Git and select Gerrit from the list on the next page. The selection page shows all Git repositories hosted on the Eclipse.org Gerrit instance. Since we want to contribute a change to Mylyn Tasks we select the mylyn/org.eclipse.mylyn.tasks repository.
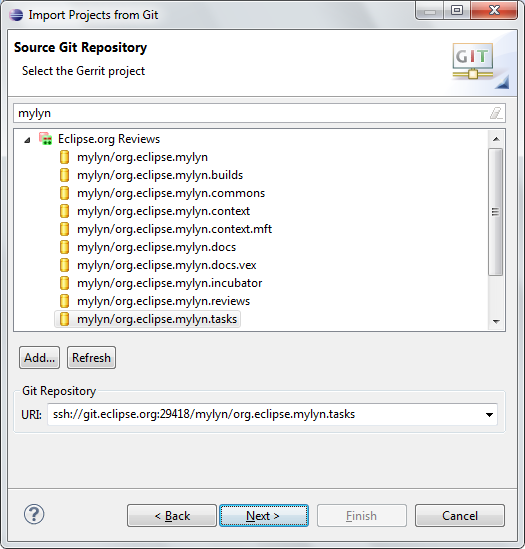
We can leave the defaults on the next pages and continue through the wizard. The repository is automatically cloned and we can select all projects to import on the last page. If an error is displayed that the SSH key is invalid or missing it needs to be generated first in the Eclipse preferences under General > Network Connections > SSH2 and uploaded to Gerrit as described at the start of the tutorial.
Once all projects have been imported we can get rid of the API baseline errors by opening the Eclipse preferences and selecting the Plug-in Development > API Baselines page and setting Missing API baseline to Ignore.
Working on Tasks
Back to our task at hand. We open the task in the task editor and use the blue ball button in the top left of the Task Editor to activate the task. Activating indicates that we are now working on the task.

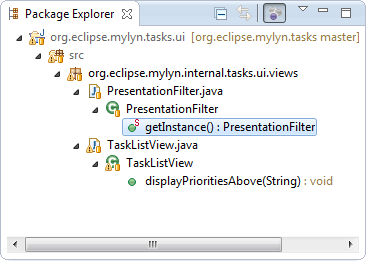
The features of Mylyn’s task-focused interface are beyond the scope of this tutorial. In short, as we edit code and navigate the source code Mylyn monitors interactions and builds a degree-of-interest model for the active task. We can now focus views such as the Package Explorer using the Focus on Active Task button from a view’s toolbar. Based on our interactions, focusing filters all elements that are not relevant to the task at hand dramatically reducing information overload and distraction. We can always go back to seeing everything by de-selecting the focus button in the toolbar.
Assuming that we have made the necessary code changes for the task we are working on and verified our changes locally we are ready to commit to the Git repository. Right clicking and selecting Team > Commit on a file brings up the commit dialog where we can provide a message describing the change. By default this is populated with the bug ID, summary and task URL of the active task. This automatically enables traceability between the task and change in the version control system.
The commit dialog has an option to automatically generate a Change-Id which is used by Gerrit to track the change. If we want to update the commit later Gerrit can relate the changes based on the change ID. We can leave the default which is replaced by a generated, unique ID as soon we commit.
Another important setting in the dialog is the Add Signed-off by toolbar button that adds another header to the commit message. The Signed-off-by header confirms that we are acting in agreement with the terms of the Eclipse.org CLA and enables committers to later accept our contribution.
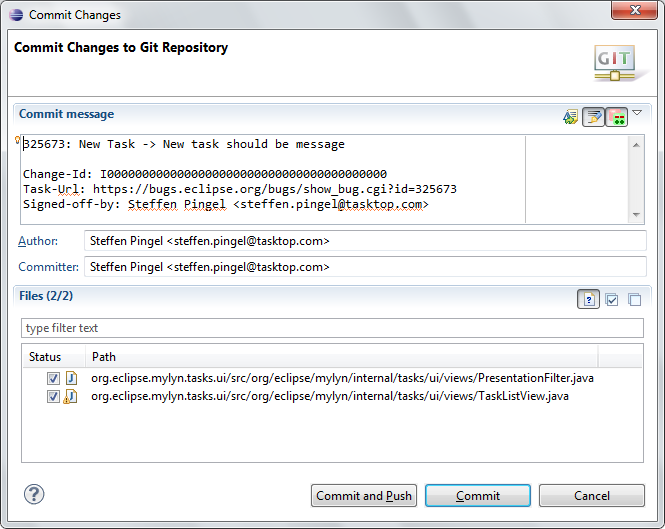
Once we select Commit and Push the change is committed to our local clone of the Git repository and then pushed to the remote Git repository which in our case is a Gerrit server.
When importing repositories from Gerrit the Eclipse Git integration creates a configuration that pushes to refs/for/master. This is a special location defined by Gerrit that causes every change to be staged in a new branch for verification and code reviewed before it is merged into the master branch.
Monitoring Builds
The Mylyn Tasks project has configured a job on a Hudson server that runs as code reviews are created or updated in Gerrit. Every time a new branch is detected a build is automatically triggered to verify the change. As soon as the builds completes Hudson comments and votes on the code review.
To view Hudson build results in Eclipse we have to add the Eclipse.org Hudson server first. Typing Builds into Quick Access in the main toolbar opens the Builds view.
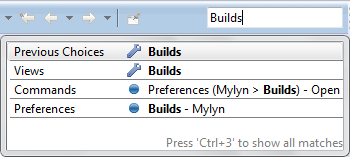
We use the New Builds Server button in the toolbar and select Hudson from the list of server types. On the next page we enter the URL of the Hudson server https://hudson.eclipse.org/hudson/ and Refresh.
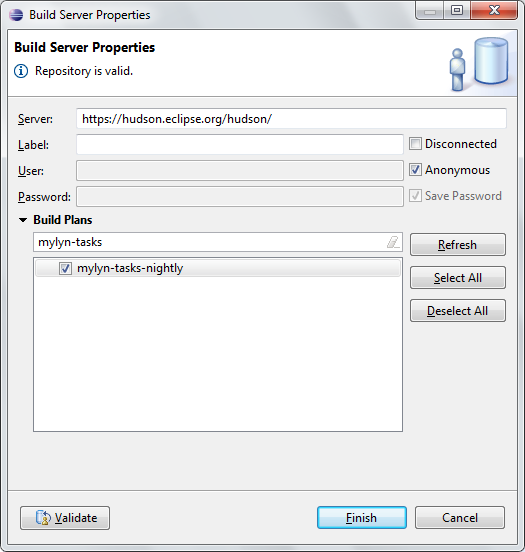
The selected build plans are now shown in the Builds view and we can monitor the results in the Builds view without switching to the browser.

Getting Feedback
We now go back to the Task List and use the Synchronize Changed button in the toolbar to make the code review we just created visible in Eclipse. A little popup notification is displayed and the review is decorated with a blue arrow indicating that it has changes that we haven’t yet looked at. Opening the code review displays a rich editor similar to the Task Editor for Bugzilla. We can review the changes, called patch sets, and the review comments.
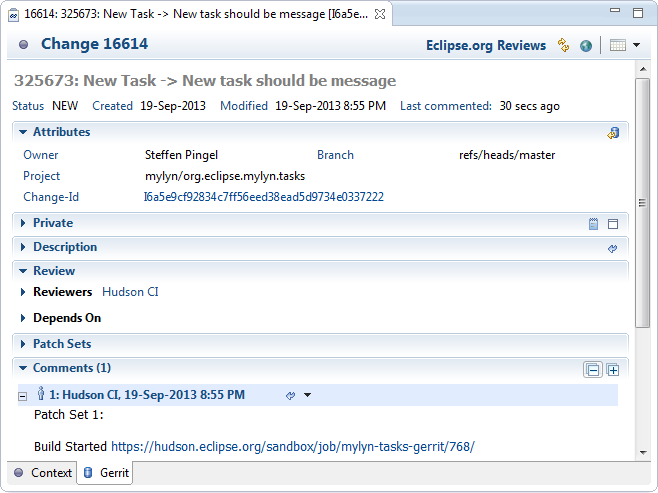
When we refresh the code review editor we notice that the review has received one vote already. The +1 in the Verified category is from Hudson indicating that the all tests passed. Now we need one or more people to review and approve the actual code change. Anyone who has an Eclipse.org account can participate in code reviews and cast their votes but in order to pass the code review a +2 is required. On Eclipse.org only committers or the respective project have the right to vote +2.
We can explicitly add people in the Code Reviewers section if we know their Eclipse.org account ID or we can wait for someone to pick up the change. Committers are expected to monitor code reviews for their project and should respond within a few days. If nobody reacts to the code review it sometimes help to post the URL of the code review on the corresponding Bugzilla task explicitly asking for a review.
While this workflow is described from the perspective of a contributor it’s important to know that committers would follow the exact same workflow and post their changes to Gerrit so other committers or members from the community can provide feedback before a change is merged.
Reviewing Code
The first step to review the code in the IDE is to open the code review from the Task List. The content under review is listed in the Patch Sets section. Each patch set corresponds to one commit on the Gerrit server and is tracked in a separate Git branch.
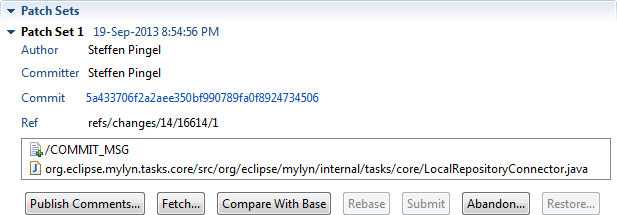
Double clicking a file from a patch set opens an editor that shows the base revision on the left and the proposed changes on the right. Comments are added by selecting any line, right clicking and selecting Add Comment. Initially, comments are saved as drafts and are not visible to others.
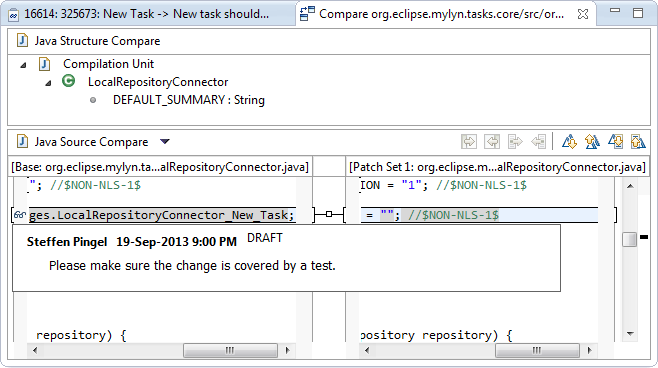
After we have added comments we need to vote on the overall change and publish comments to make them visible to everyone. To do that we select Publish from the review editor which open a dialog.
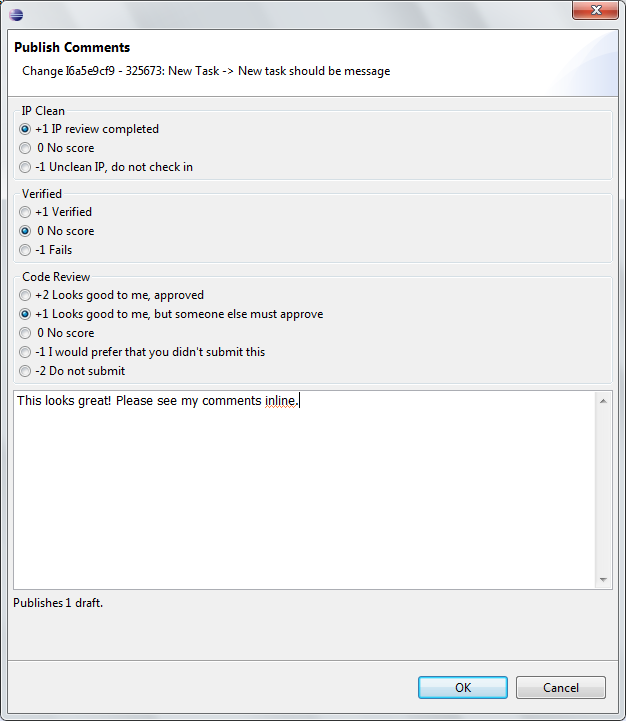
The IP Clean flag indicates that all requirements of the Eclipse IP process such as a valid CLA and copyright headers in changed files have been met. Only committers can set that flag. The same applies to the Code Review category. Only project committers have permission to vote +2 and submit the review as a last step.
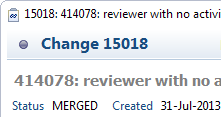
Once a review is submitted by a committer, the most recent patch set on the review is merged into the master branch by Gerrit. This completes the contribution cycle and the new feature is now part of Mylyn.
Further Reading
About the Authors

