Out-of-Box GlassFish & Payara Clustering

Ensuring trouble-proof 24/7 service delivery is among of the most discussed areas in cloud hosting for the last few years, and the very obvious and commonly used solution here is building a clustered infrastructure for your project.
Intending to help our customers to deal with such a non-trivial task and save time for other project-related activities, today we are glad to present a special high-availability solution, designed to facilitate the Java EE, going forward Jakarta EE, application hosting, - embedded Auto-Clustering for GlassFish, going forward Eclipse GlassFish, and Payara application servers.
The main advantage of this solution is in the automatic interconnection of multiple application server instances upon the application topology change, which implements the commonly used clustering configuration.
So, the article below describes how the Glassfish and Payara auto-clustering works, as well as infrastructure topology specifics and the way you can get the appropriate development and production environments up and running inside Jelastic PaaS.
How the Auto-Clustering for GlassFish and Payara Works
In the most general sense, any "clusterized solution" can be defined as a set of interconnected instances that run the same stack and operate the same data. In other words, this means that the corresponding server should be horizontally scaled and share user sessions.
Starting with the Jelastic 5.5.3 version, a new Auto-Clustering feature is introduced allowing to enable clusterization of the GlassFish and Payara instances directly within the topology wizard:
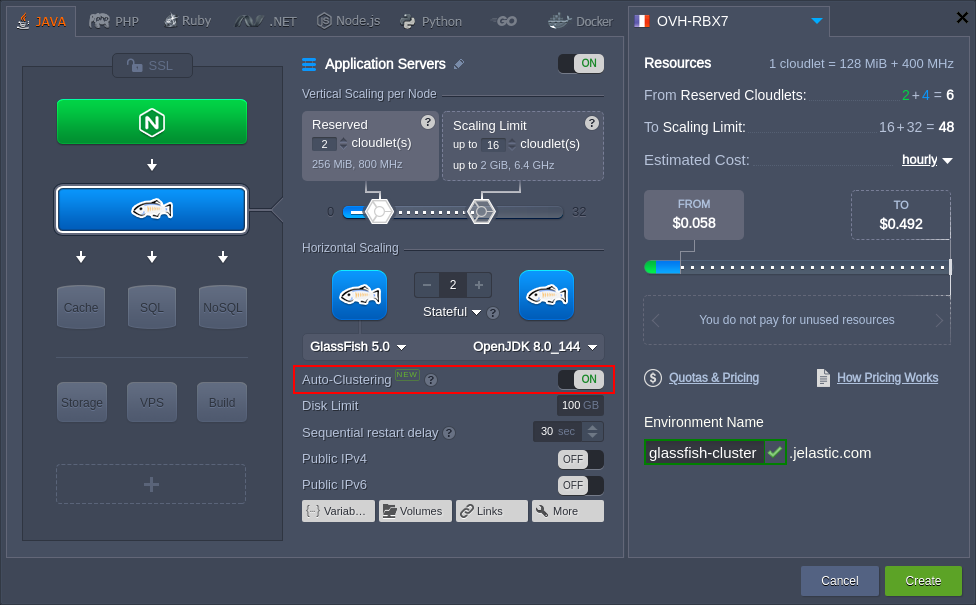
Choose either GlassFish or Payara application server on the Java tab of the wizard. Then, in the central part, locate and enable the appropriate Auto-Clustering switcher. Configure the remaining settings up to your need (consider horizontal scaling to get a reliable solution from the start).
Tip: The Auto-Clustering feature is also available for some other software templates (e.g. MySQL, MariaDB, and Couchbase).
Based on your environment purpose, you may consider not to use Auto-Clustering (for example during development). In such a way a regular standalone server(s) will be created without configuring a cluster.
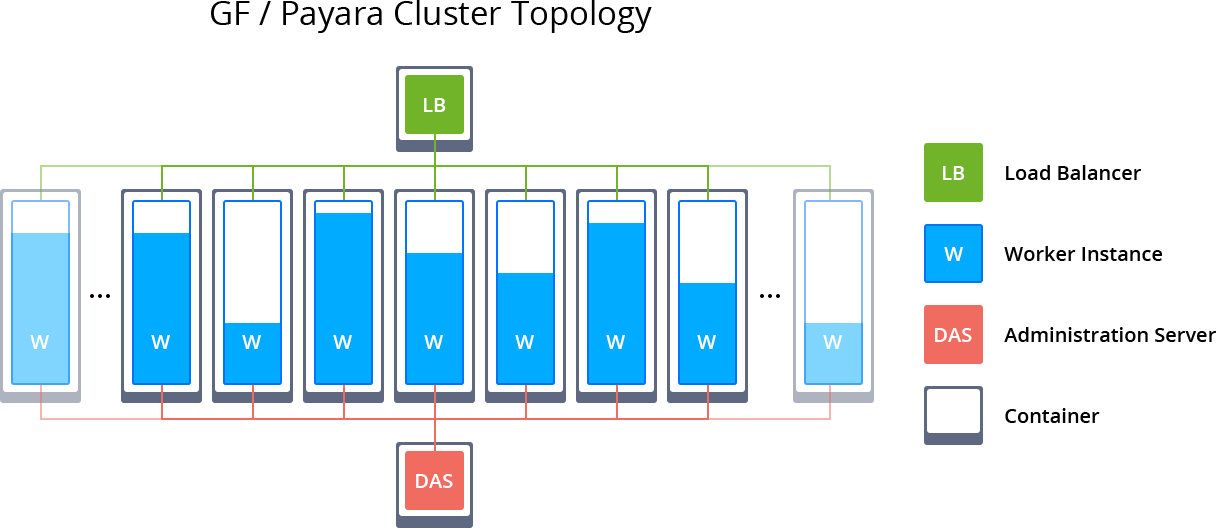
For production, clustering is virtually a mandatory option to ensure your application high-availability and smooth/uninterrupted experience for clients. The usage of the Auto-Clustering by Jelastic is the simplest way to implement a reliable topology for your services without a necessity to manually configure anything. Herewith, the following adjustments take place:
- for 2+ GlassFish (Payara) instances, environment topology is complemented with a load balancer (LB), intended to handle the incoming requests and distribute them across the workers
- An extra Domain Administration Server (DAS) node is automatically added - a dedicated instance to perform centralized control of cluster nodes and to configure interaction between them via SSH. Its integration implies a number of specifics:
- administration server is linked to all workers within the application server layer with the DAS alias hostname, which can be used by workers for further interaction
- to enable proper nodes connectivity and control, the system automatically generates an SSH keypair for DAS node and places it within a volume, mounted to all the rest of cluster instances
Session Replication Implementation
To ensure high availability of your cluster, the Jelastic PaaS automatically configures session replication across the worker nodes. This way, all user session data, that is stored during its processing, is distributed across all application server instances from the node that has actually handled the request.
Together with automatically configured sticky sessions mechanism on the load balancer layer, session replication ensures hosting of the increased reliability and improves failover capabilities of your application within such GlassFish or Payara cluster. Herewith, depending on a used stack, the implemented replication mechanism will slightly differ - let's consider each approach in more details.
GlassFish Session Replication with GMS
Within the GlassFish cluster, session replication is powered by the Group Management Service (GMS) - a built-in application server component that ensures failover protection, in-memory replication, transaction and timer services for cluster instances.
GMS uses TCP without multicast to detect cluster instances. When a new node is joining a GlassFish cluster, the system re-detects all running workers and DAS node - such auto discovery mechanism is applied by means of the GMS_DISCOVERY_URI_LIST property being set to the generate value.
Payara Session Replication with Hazelcast
Session replication inside the Payara cluster is based on Hazelcast, which has an extra benefit of being JCache compliant and provides the embedded Web and EJB sessions' persistence. This in-memory data grid is automatically enabled at all Payara instances to discover your environment cluster members by TCP without multicast.
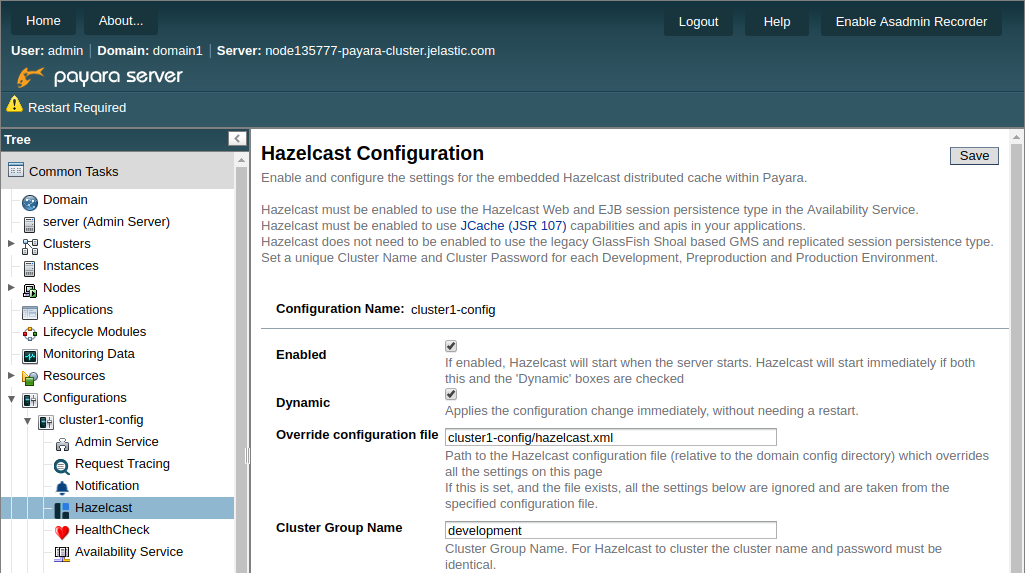
To manage Hazelcast settings, access the Administration Console and refer to the Hazelcast Configuration page.
Deploy Example Application for HA Testing
Now, let's check the high availability of such automatically composed cluster with the example of scaled GlassFish server. To make sure of its fault tolerance, we'll deploy a dedicated testing application, which enables to add some custom session data and to view the detailed information on a server this session is handled by. This way, stopping particular cluster instances allows ascertaining that the already running user sessions will continue being processed even in case the corresponding server fails. So, let's see it in practice.
1. Click Open in browser next to your environment to access the application server start page.
Within the opened page, select the go to the Administration Console reference and log in with credentials, delivered to you via email upon the environment creation.
2. Switch to the Applications section and upload clusterjsp.ear application to the Packaged File to Be Uploaded to the Server location.
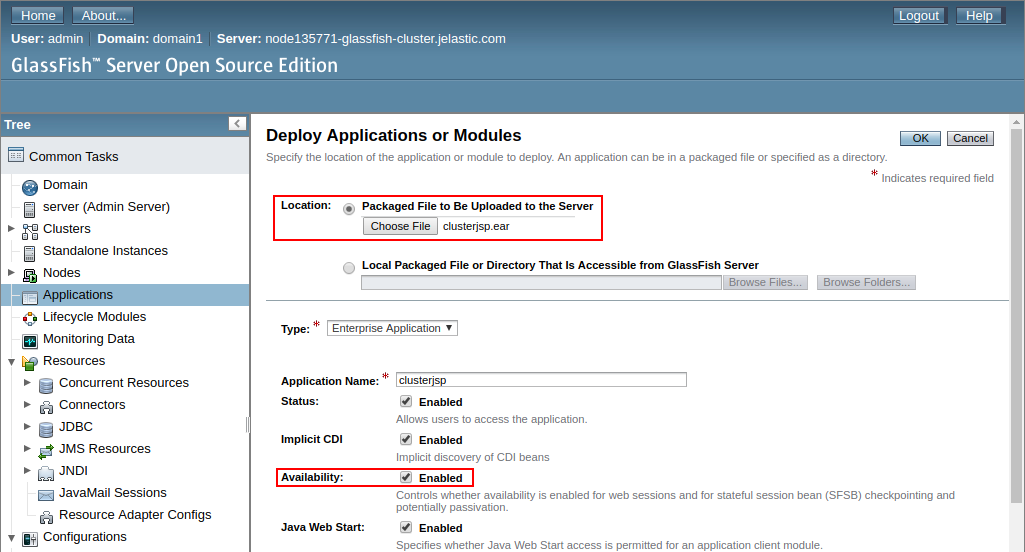
3. Check to have the Availability enabled and set up cluster1 as the application target, then click OK to proceed.

4. Now, open environment in browser and append /clusterjsp to the URL.

Provide any custom Name and Value for your own session attribute and click on Add Session Data.
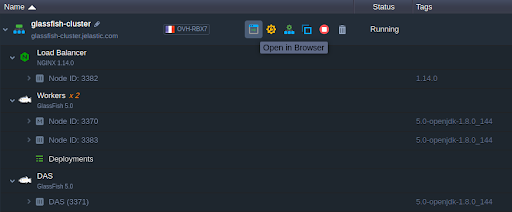
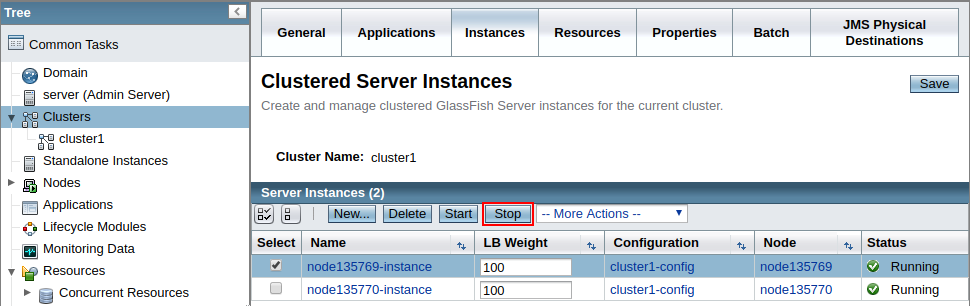
5. Switch back to the admin panel and navigate to the Clusters > cluster1 > Instances tab. Here, select and Stop the instance your session is running on (its hostname is circled in the image above).
6. Return to our application and Reload Page with the appropriate button.
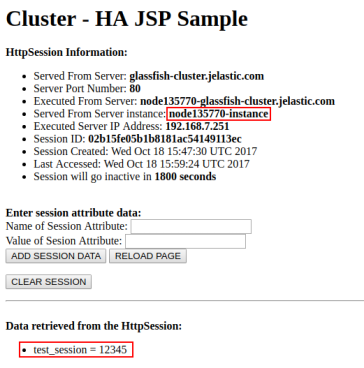
As you can see, despite the session being handled by another instance, our custom attribute is still output.
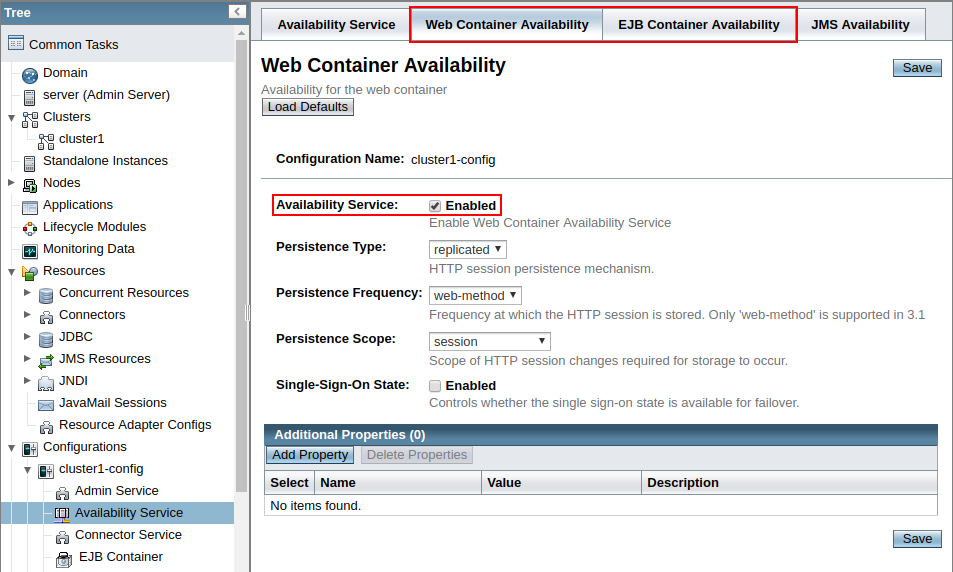
Tip: All replication settings are available at the Configurations > cluster1-config > Availability Service section of the server admin panel. Here, you can see the following replication modes being enabled by default:
- Web Container Availability
- EJB Container Availability
Cloning Cluster for A/B Testing
When releasing a new application version or just applying some essential adjustments, it’s a good practice to check how the newly implemented changes could affect the service work and your users’ appeal. The Jelastic PaaS allows you to accomplish such testing ‘on-fly’ (i.e. without service downtime and implicitly for your customers) with the Clone Environment option.
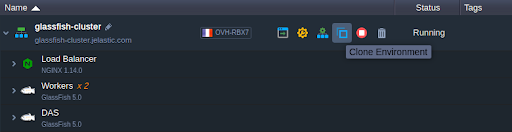
As a result, a ready-to-work cluster copy will be created, with all the required modifications being already applied. To be more precise, this means that a cloned DAS node operates with the appropriate cloned workers, which are already listed within its admin panel, and all applications from the original environment are deployed to the cloned one as well. Thus, the only thing that remains for you to do is to recheck your app's code & custom server configurations for the hardcoded IPs/domains and fix them accordingly, if are any.
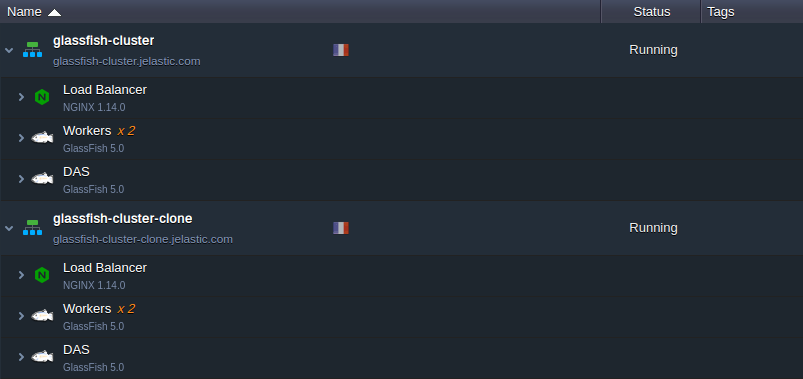
This way, you can apply the implied changes to your environment copy without affecting the actual production one.
Subsequently, you can also evaluate the productivity and effectiveness of the modified application version comparing to the current, original one, i.e. to perform so-called A/B Testing. At Jelastic PaaS, this can be implemented with a special supplementary Traffic Distributor add-on.

Being placed in front of a pair of environments with the Sticky Sessions mode chosen, it provides smart routing of the incoming requests according to the stated backends weight. For more details on a proper TD configuration in this case, refer to the dedicated A/B Testing guideline.
...and a Few Useful Tips
When your GlassFish or Payara cluster is set up and you’ve ensured everything works as intended, you could also consider the hints below to get the maximum efficiency of its running inside the Jelastic Cloud with the extensive platform functionality:
- For optimized resource consumption, set auto-scaling triggers within your environment settings so that nodes will be automatically added/removed within a cluster depending on the incoming load.
- For connection with any database software stack, the cluster requires the appropriate libraries being integrated to its Administration Server - the most popular ones are available by default at all newly created GF/Payara nodes. And if operating with legacy instances, make sure the /opt/glassfish/glassfish/domains/domain1/lib DAS directory contains the appropriate files (otherwise - just upload them to the mentioned location manually).
Conclusion
We hope the described GlassFish & Payara cluster implementation details were clear enough for you to decide this solution is the one you need. Give it a try with creating your own cluster at one of Jelastic Cloud Platforms during a free trial period.
About the Author