Creating a Cloud Foundry Server
Managing Applications and Services
Restart, Stop, Push/Publish an Application
View Running Application Instances
Persist Deployment Properties: Generate manifest.yml File
Link and Unlink Project to Deployed Application
The Eclipse Tools for Cloud Foundry, also known as “Cloud Foundry Tools” or CFT, is a member of the cloud family at Eclipse, and is part of the Eclipse Simultaneous Release, and also part of the JEE EPP package. Cloud Foundry itself is an open platform as a service that provides a choice of clouds, runtime frameworks, and application services.
CFT can be used out of the box to connect to Cloud Foundry and deploy applications with a simple drag and drop operation. It can also be extended by third parties to contribute their own Cloud Foundry flavors, and supports both DEA and newer platforms based on Diego.
CFT is included in Neon JEE EPP package and can be used without any further installations. To install onto an existing Eclipse, install the WTP Tools and then install the CFT Tools from the Eclipse Marketplace.
Users also need a Cloud Foundry account to connect to, for example, IBM BlueMix or Pivotal Web Services, as well as a Java web project in their Eclipse workspace.
CFT currently supports deploying Dynamic Web Projects and other war-packaged applications out of the box. Other application types like Node.js and Spring Boot are also supported by third party Eclipse tools that extend CFT, like BlueMix Tools and Spring Tool Suite, respectively. However, these additional application types require further tool installation, and therefore will not be covered in this documentation.
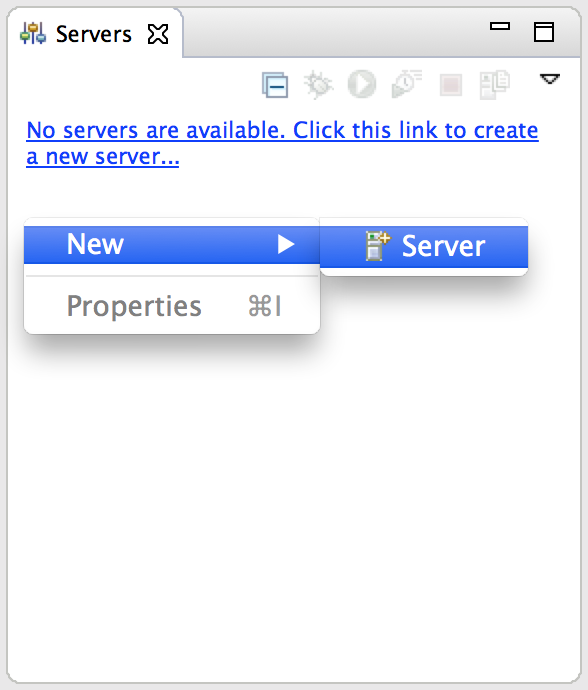
To deploy an application to Cloud Foundry, a Cloud Foundry server must first be created. This can be done easily by opening the Eclipse Servers view, and either right-clicking to open the context menu, and selecting New -> Server, or clicking on the link in the view if no other server exists.
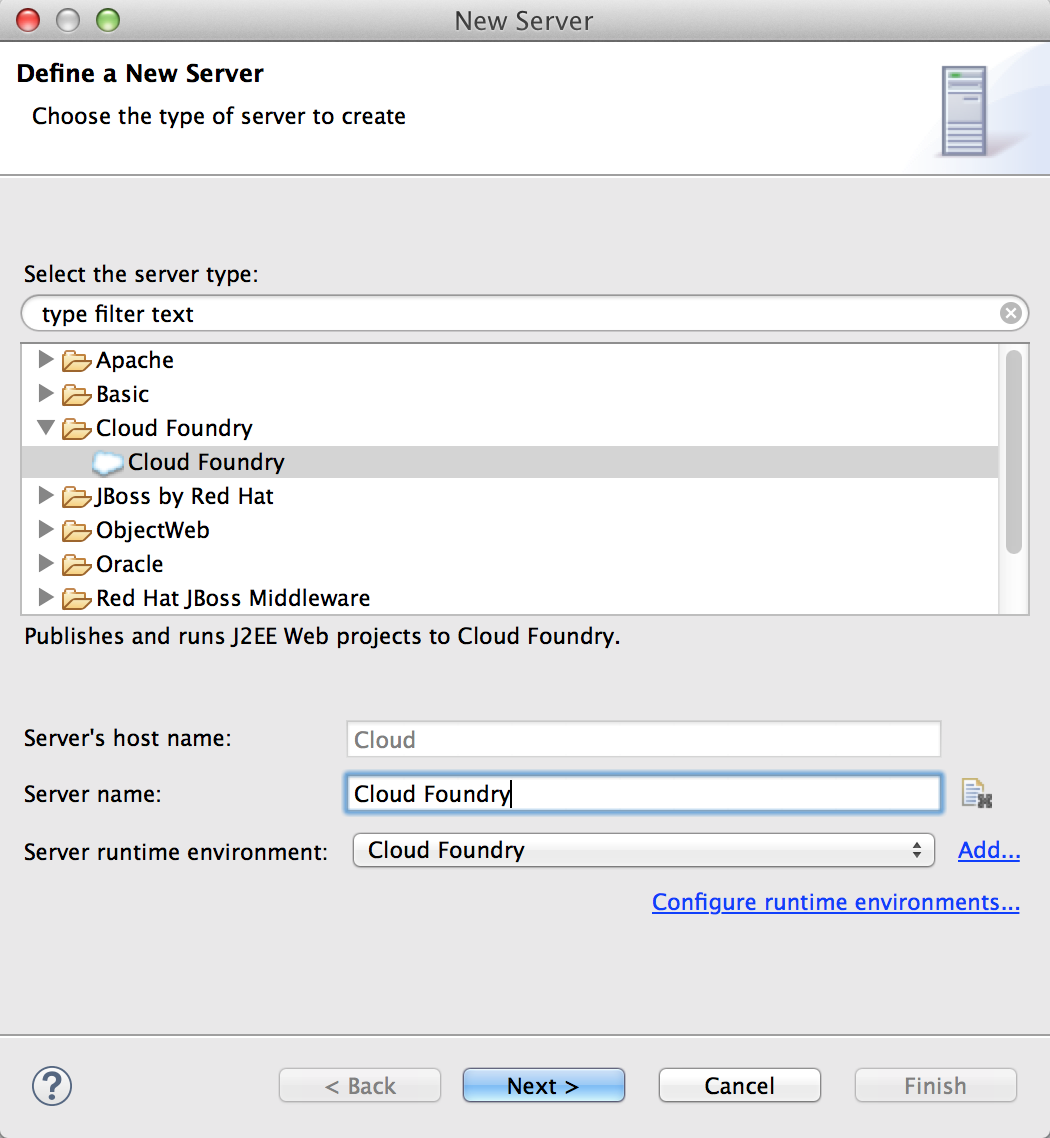
This will open the New Server wizard. The Cloud Foundry server type will appear under “Cloud Foundry”, and after selecting it, users have the option to edit the name of the Cloud Foundry server instance that will be created.
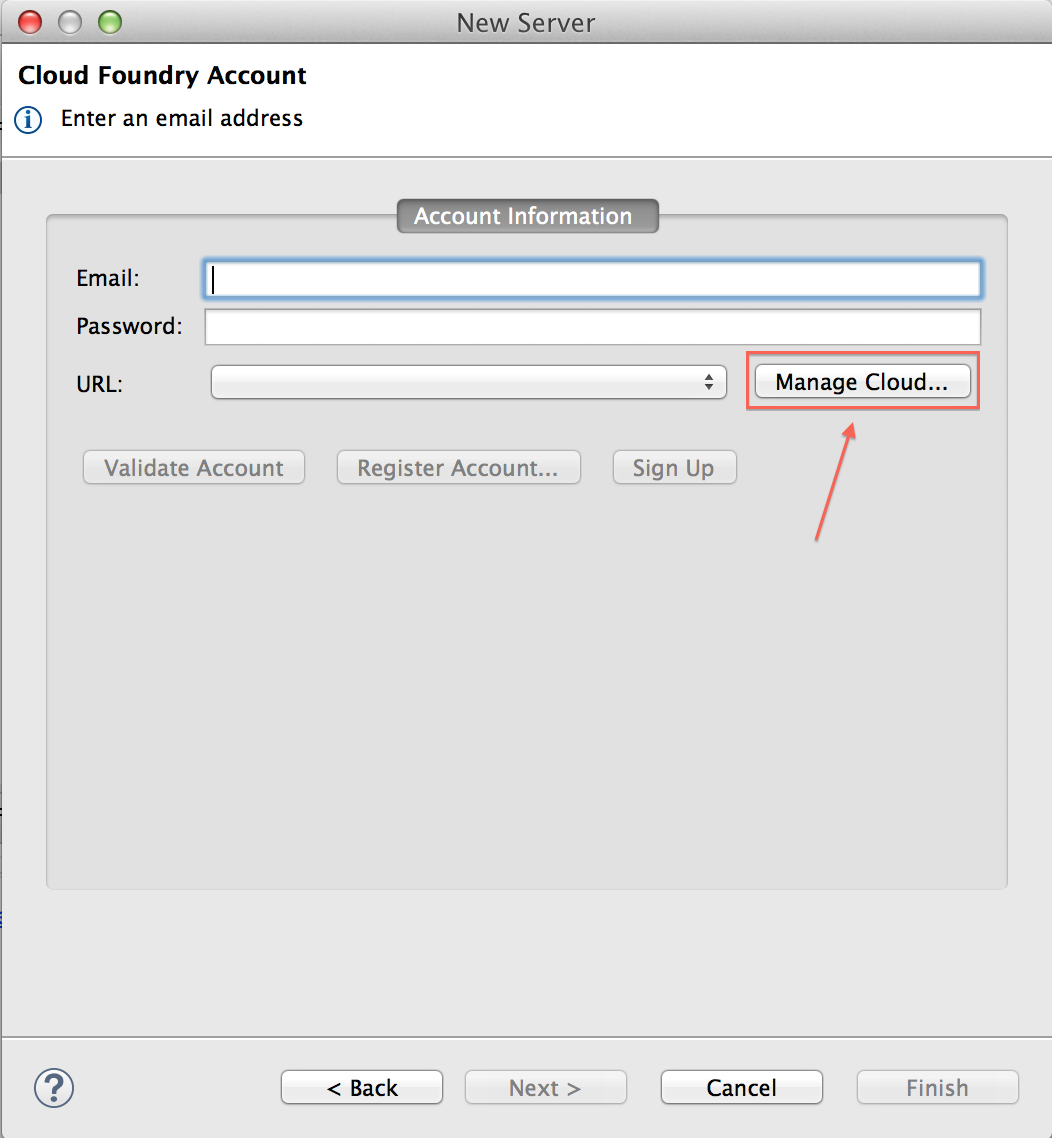
Details for the Cloud Foundry server also need to be entered by clicking “Next”. This opens the next page where a server URL needs to be added through “Manage Cloud”, as well as the user’s Cloud Foundry account credentials. Users must have an account with a Cloud Foundry provider prior to continuing.
For example, if connecting to Pivotal Web Services, the server URL would be:
http://api.run.pivotal.io
Once account details are entered, users can click “Next” to select a Cloud Foundry organization and space to connect to. When users click “Finish”, the server instance will appear in the Servers view.
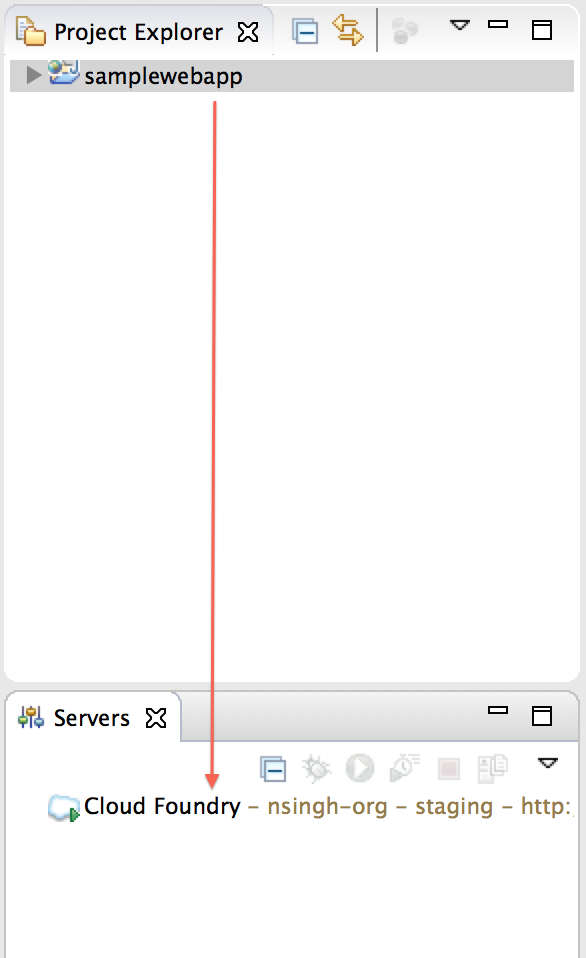
Application deployment to Cloud Foundry can be done simply by dragging and dropping a Java web project to the Cloud Foundry server instance in the Servers view.
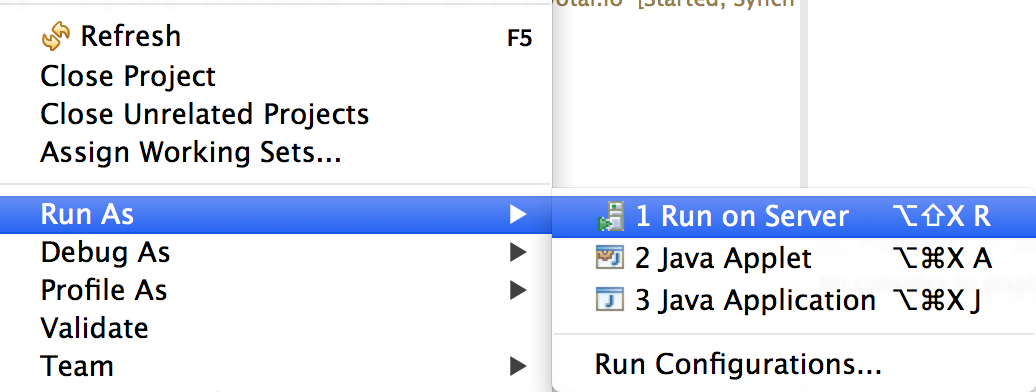
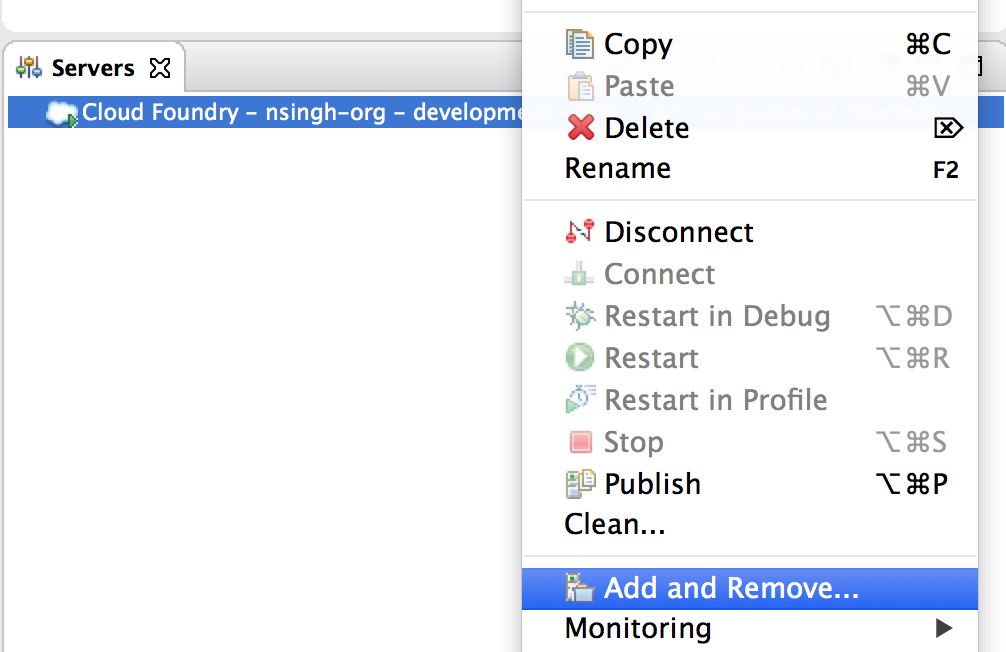
Users can also deploy applications by these other options:
Right-click on your project in the Package Explorer to select this context menu action.
Right-click on your Cloud Foundry server instances in the Servers view and select this
context menu action.
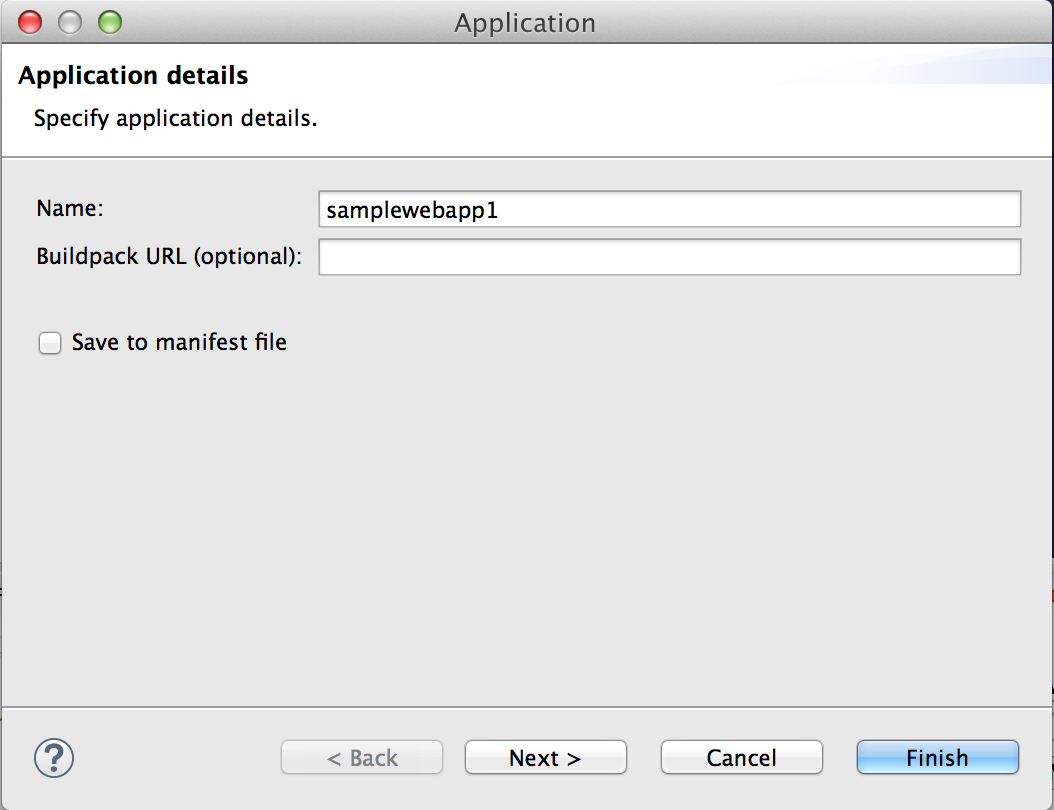
An application deployment wizard will then be opened, allowing users to edit default deployment details like the application name, URL, memory, and service bindings.
The application names are used as hosts by default. If the wizard detects that a host using the initial application name is already taken, application URL host-taken detection will automatically suggests a new name. In the screenshot above, the default application name was automatically modified by the wizard to “samplewebapp1”, as the original “samplewebapp” was already used by another application URL.
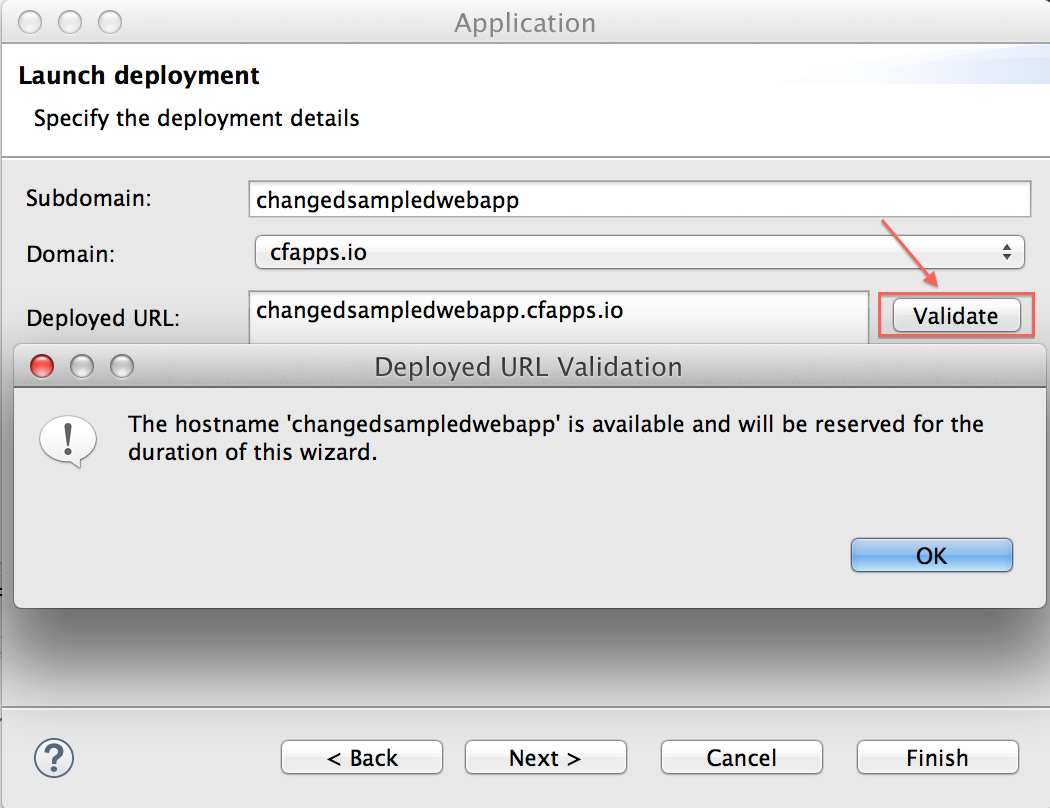
In addition, this new feature allows URL validation in the next page, for cases where users want to specify a different URL than the one generated by the wizard.
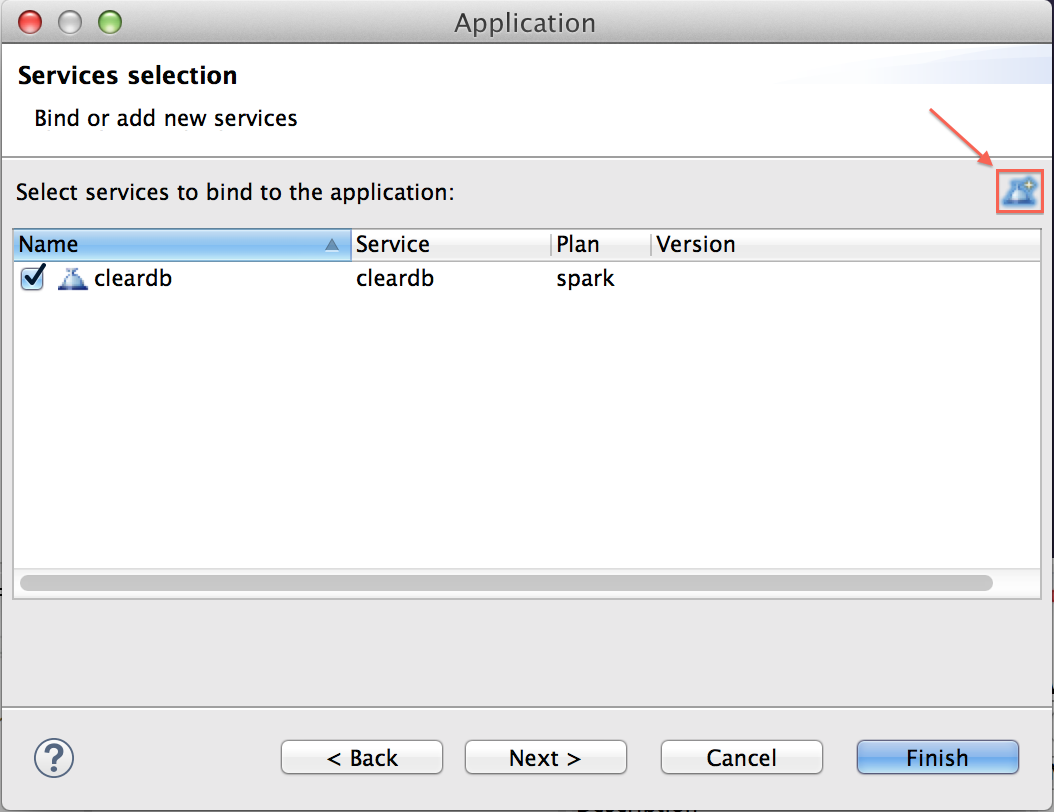
On the following page, users also have the option to create and bind services to an application.
Once users click “Finish”, the application deployment will begin, and the Eclipse console will automatically open showing deployment progress and log streaming from Cloud Foundry.
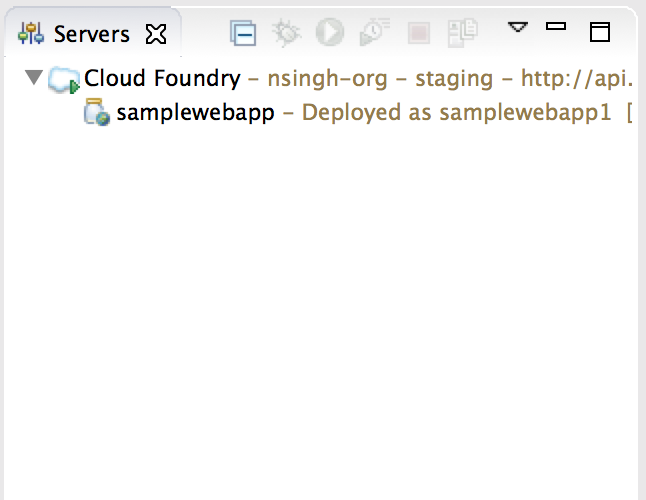
A deployed application will appear in the Servers view under the Cloud Foundry server instance.
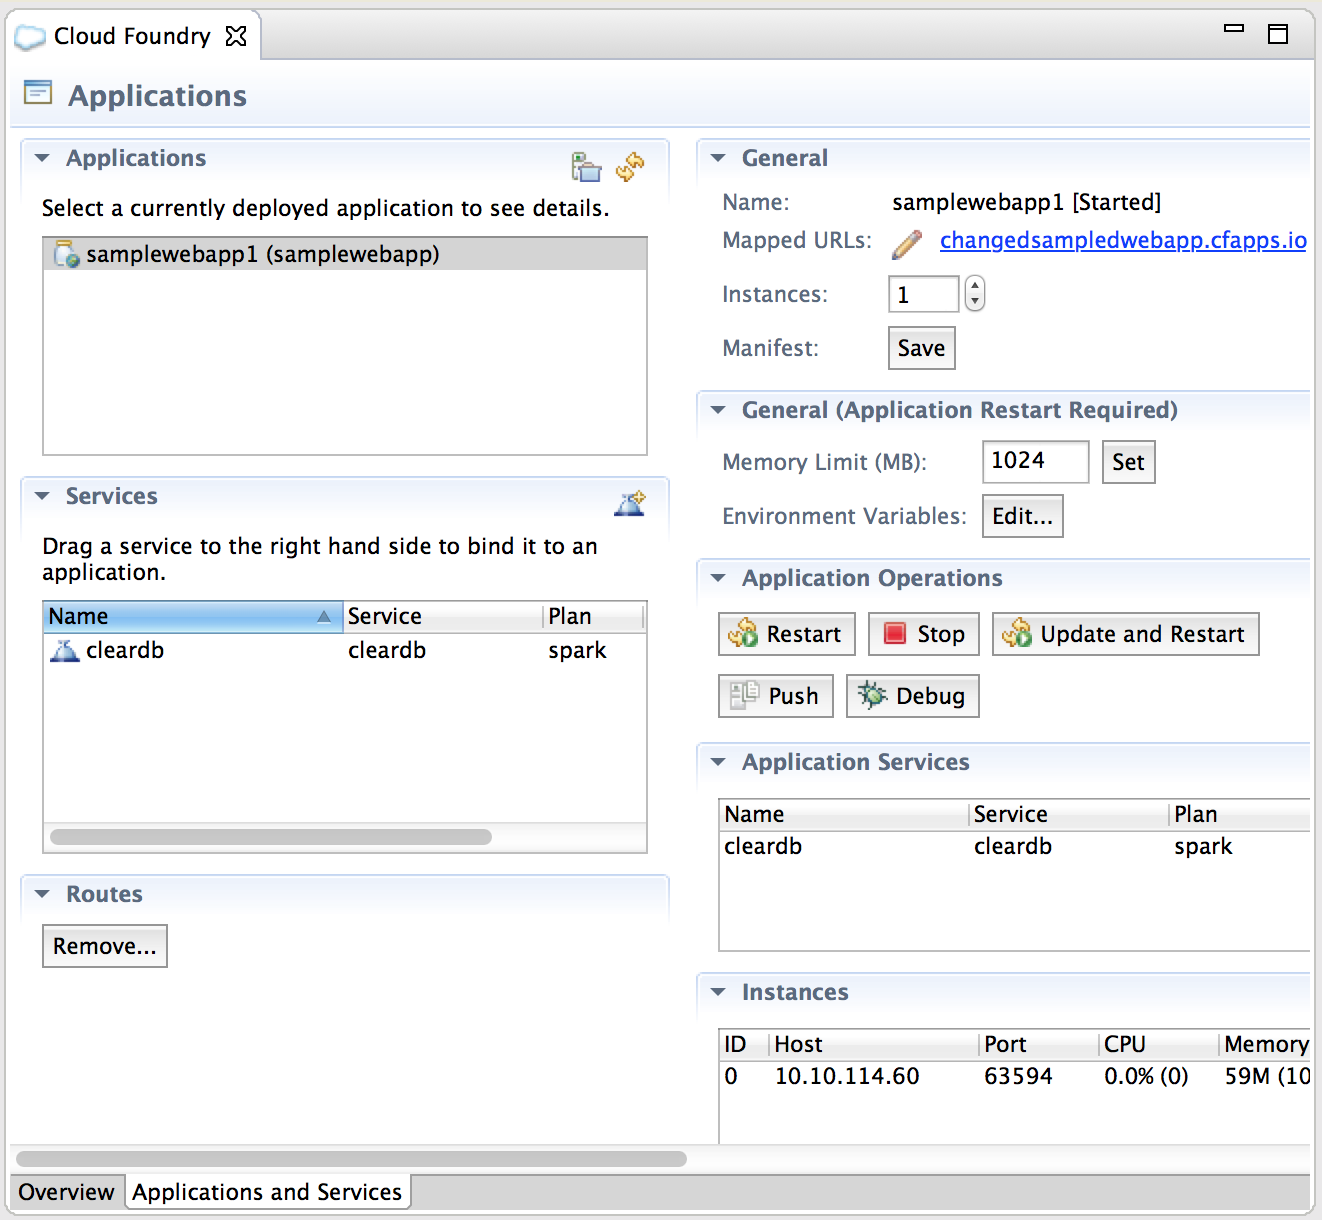
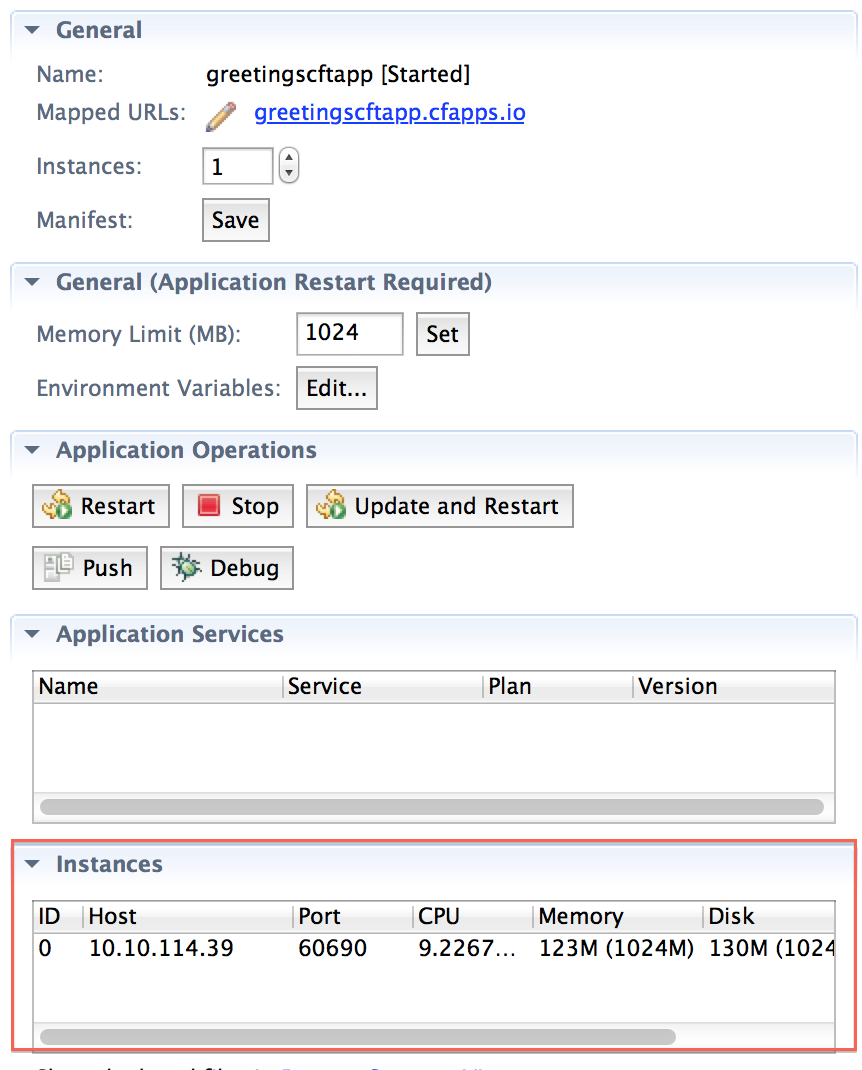
To manage the application, including scaling memory and number of application instances, binding and unbinding services, and restarting and stopping the application, users can double-click on the application in the Servers view. This opens the Cloud Foundry editor for that server instance.
The editor has two tabs: Overview, that shows general information about the Cloud Foundry target and the user account, and Application and Services, where users can manage their application and services.
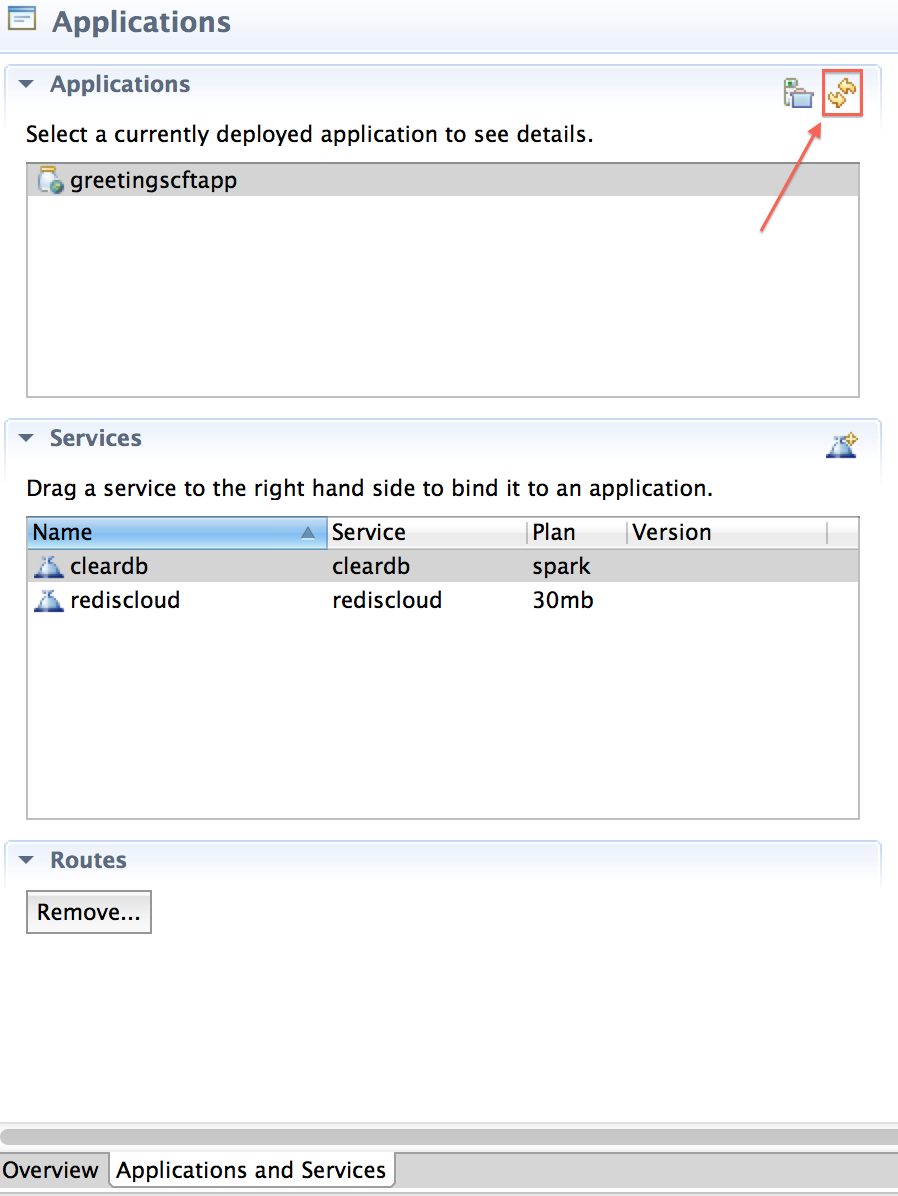
To refresh the list of application and services, select the refresh button in the “Applications” section in “Applications and Services” tab.
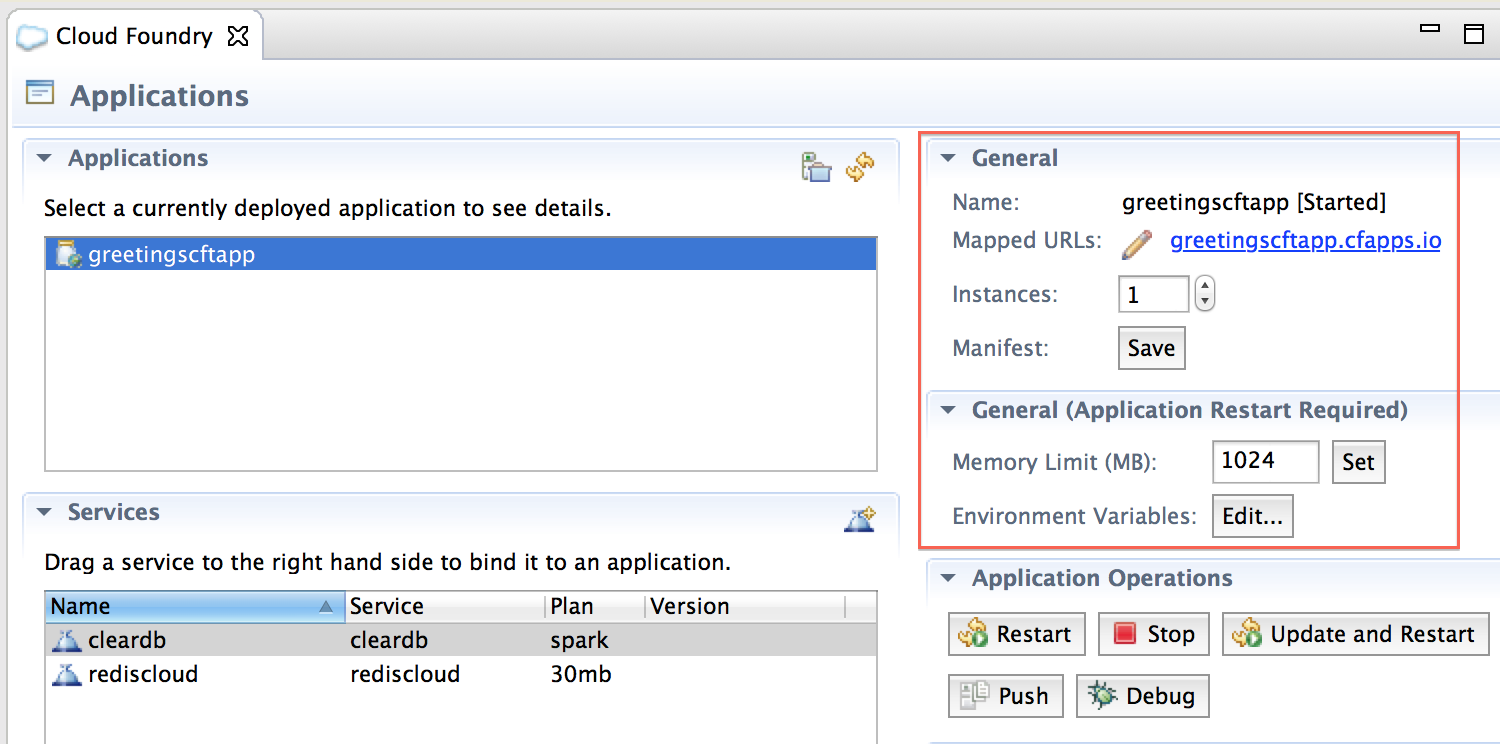
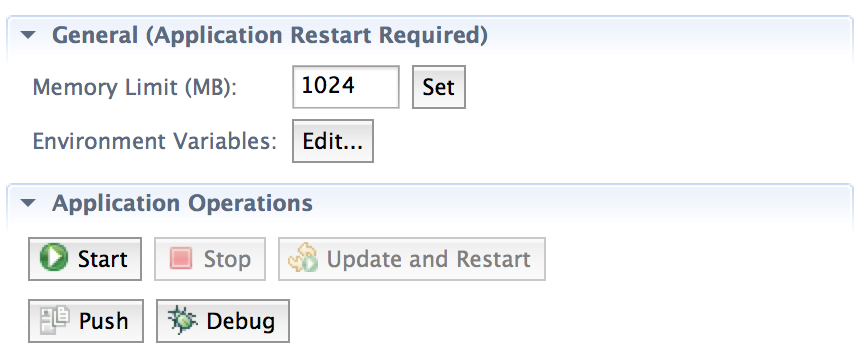
Select an application on the left side. This will open the UI to scale the application on the right side in the “General” sections. Note that some scaling options, like changing memory, require an application restart.
Delete an Application
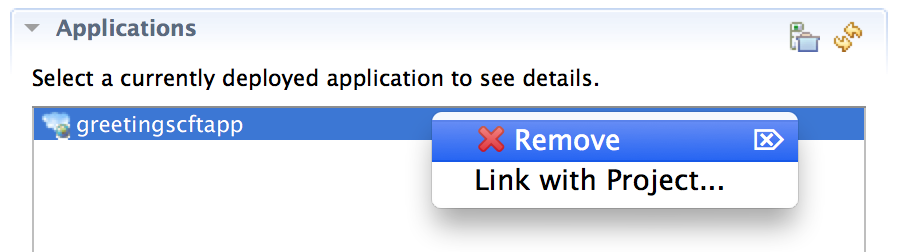
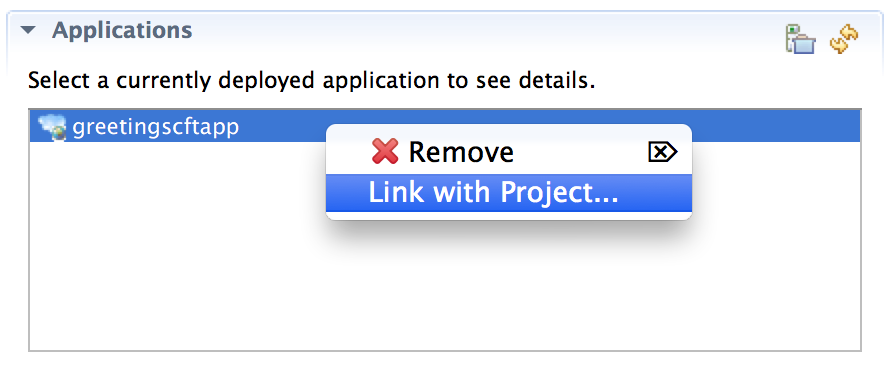
Select an application in the “Applications” section, right-click, and select “Remove” context menu action.
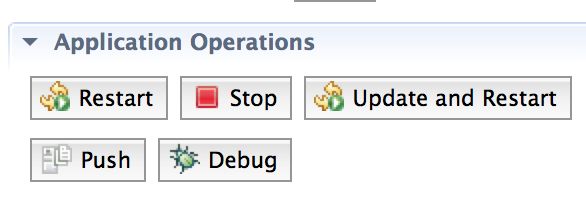
Select an application in the “Applications” section, and on the right side, users can click on restart/stop operations in “Application Operations” section. Note that some buttons may be disabled if either the application is not linked to a project (see Link/Unlink project section below), for example “Push” and “Update and Restart” are disabled if no project is linked, or “Debug” if the Cloud Foundry server does not support SSH Debugging. See Debugging section below.
“Restart/Start” starts the application in Cloud Foundry without pushing any new application files.
“Push” does a clean publish of the entire application project.
“Update and Restart” only publishes changes in the application project.
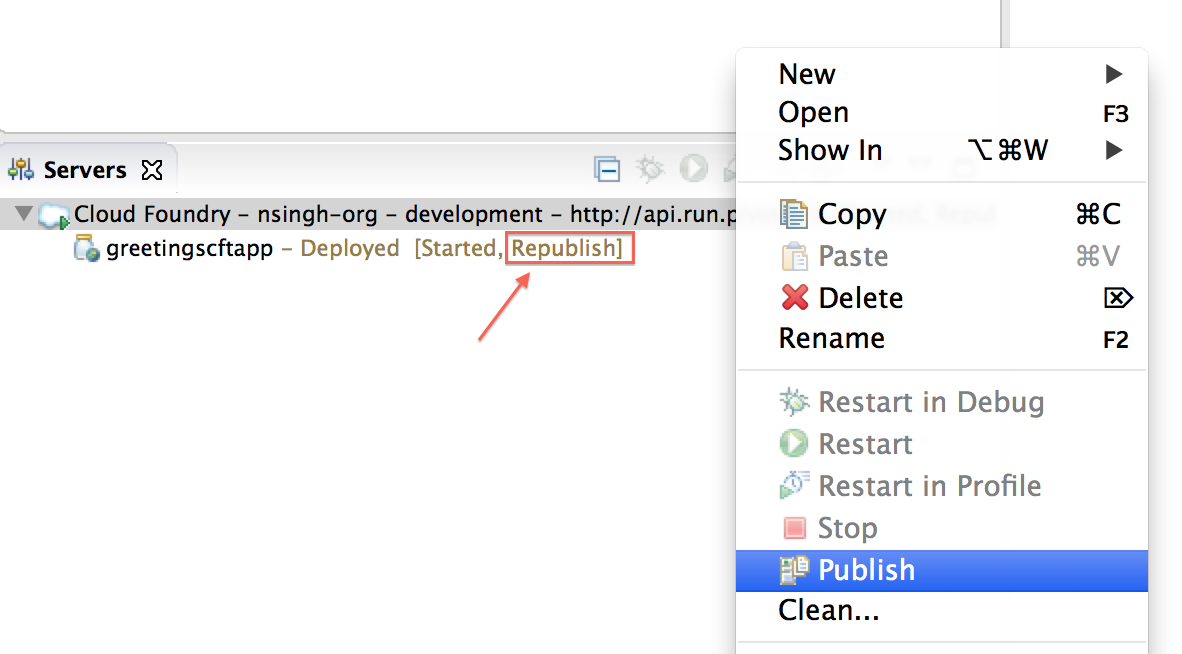
Users can also publish changes to a project through the Servers view “Publish” context menu action selected on a server instance. The Servers view will indicate if an application is out of sync with a project by showing “Republish” state beside the application in the Servers view.
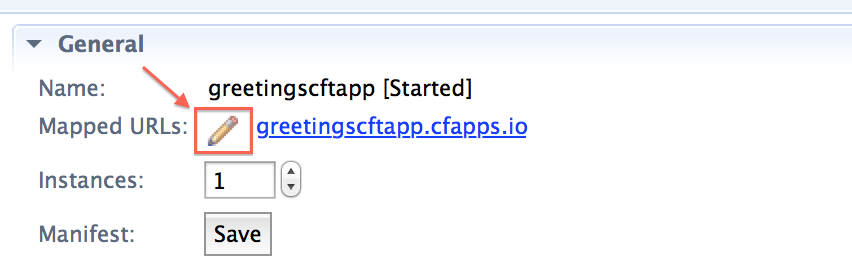
Select an application on the left side, and on the right side, beside “Mapped URLs” in the “General” section on the top-right, click on the pencil button.
If the application is running, users can view stats for running instances by selecting an application on the left side and then scrolling down to the bottom right of the editor. If necessary, refresh the editor to see updated instance stats.
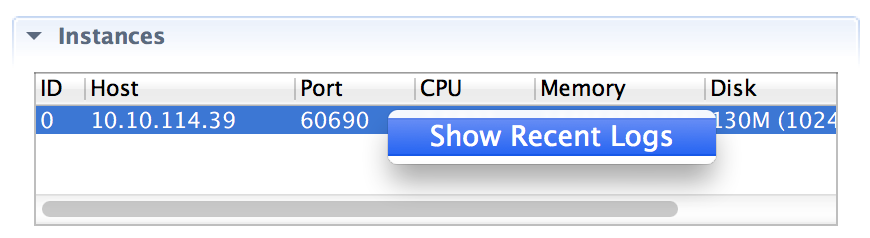
Application consoles are automatically opened when performing most operations on an application. To manually open the console, depending on the version of CFT that is installed, either right-click on the application in the “Applications” section of the editor, OR, select an instance in the “Instances” section, and select “Show Recent Logs” context menu action.
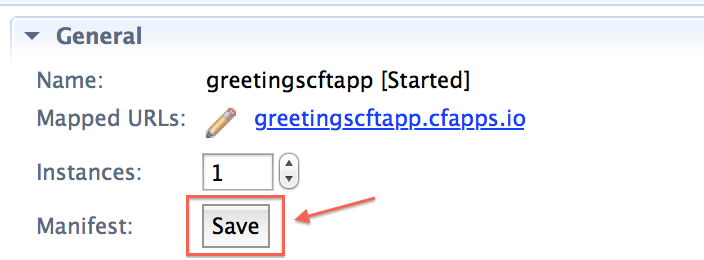
For applications that are linked to a workspace project, users can persist the deployment properties of an application, like the application name, bound services, URL, and memory in a manifest.yml file.
This file can be generated by the tools and added to the project by selecting the application in editor, and on the right side, click on “Save” button beside “Manifest”.
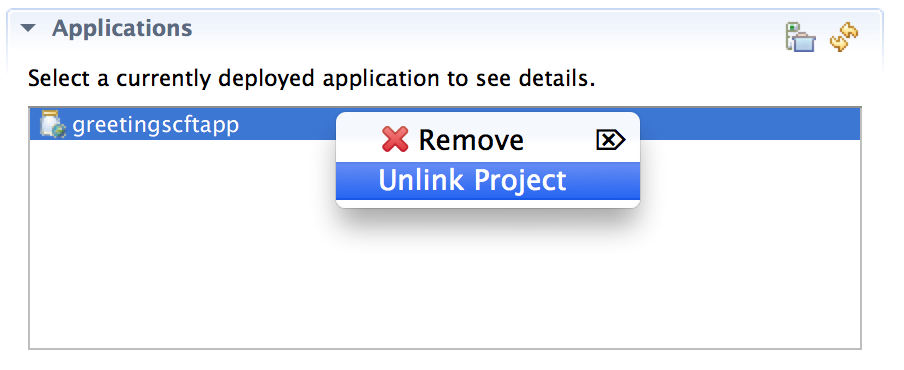
Users can link and unlink a workspace project to a deployed application. Unlinking a project may disable certain features like “Push”, “Update and Restart”, and “Debug” as an application will no longer be associated with a project. Likewise, linking a project to a deployed application will enable these features.
To link or unlink, select the application in the “Applications” section of the editor, and right-click to see the “Link/Unlink” context menu actions.
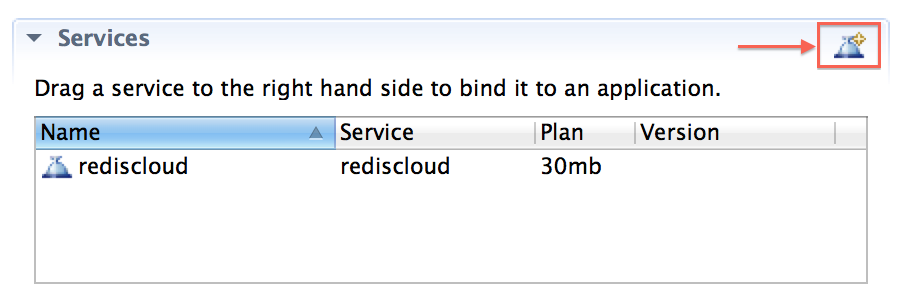
Services can be created, deleted and bound to applications from the “Application and Services” tab in the editor.
Click on the “Add Service” button on the top right of the “Services” section.
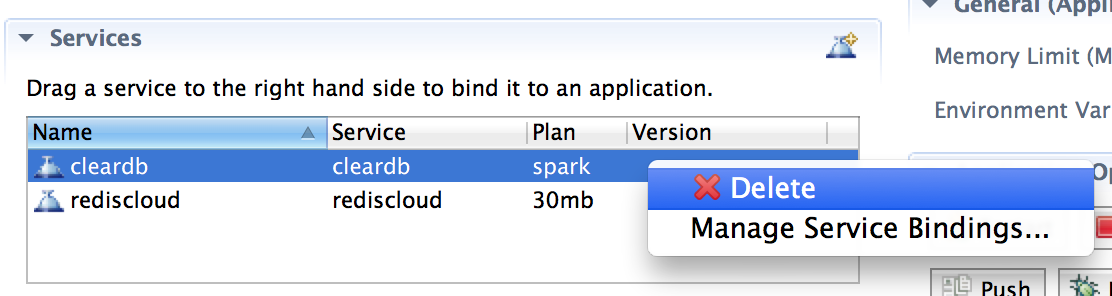
Right-click on the service in the “Services” section and select “Delete”.
NOTE: Services can only be deleted if they are not currently bound to applications. If a service is bound to an application, an error message will appear telling the user to first manually unbind the service from the application before deleting it. This is a safety measure to prevent accidental deletion of a service, like a database, that may contain client data used by a deployed application.
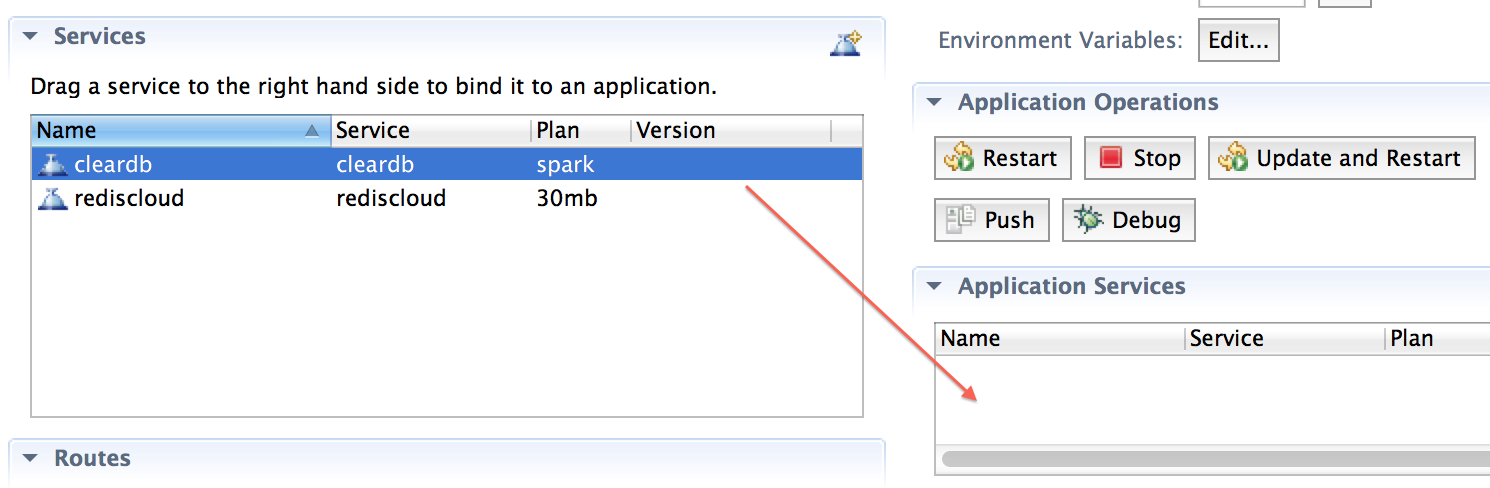
Select an application in the “Applications” section on the left side of the editor.
Select a service from the “Services” section on the left side of the editor.
Drag and drop the service to the right side to “Application Services”.
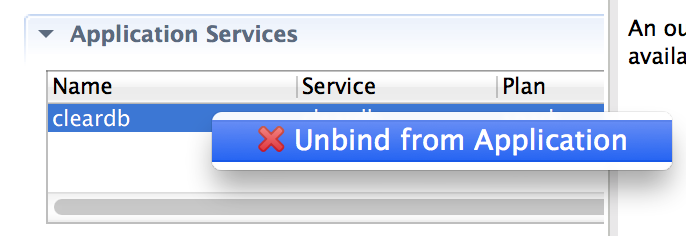
Right-click on the service in “Application Services” on the right side of the editor and select “Unbind from Application” action.
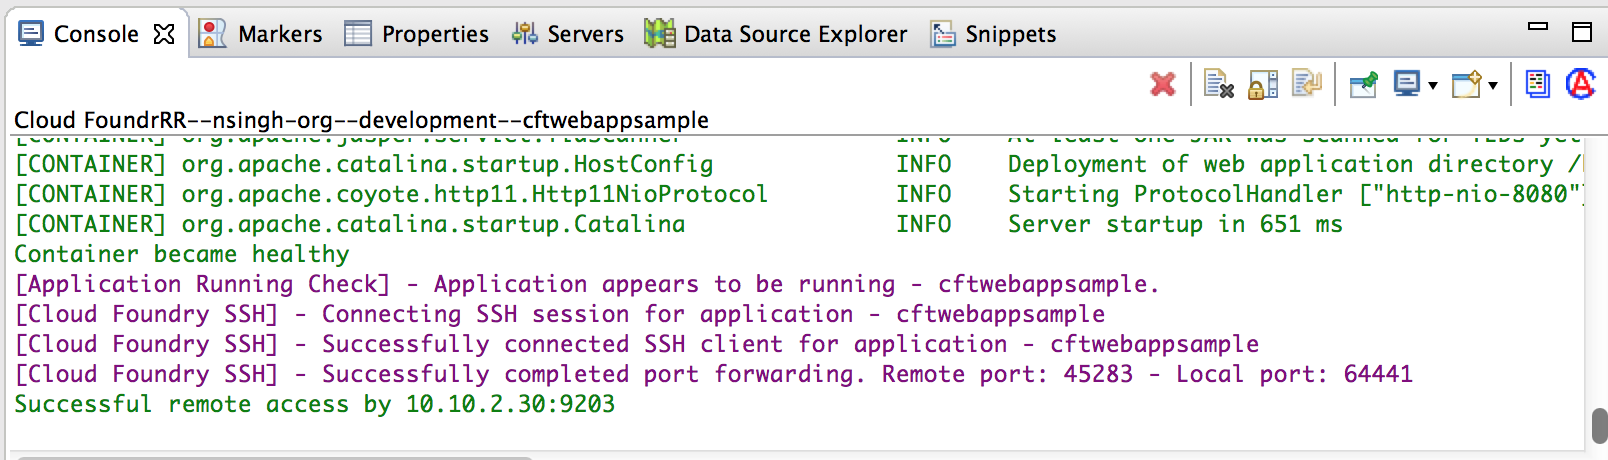
Debugging through SSH is now enabled for certain Cloud Foundry that are based on Diego and support SSH, for example Pivotal Web Services.
Applications can be debugged on these servers by simply pressing the “Debug” button. The Eclipse console will indicate when the SSH session is established, and the Eclipse debugger is automatically connected to the application in Cloud Foundry.
CFT is an open source project with a growing community, and is actively maintained and updated by various Eclipse contributors, including Pivotal and IBM.
It is part of the Eclipse release train, and has frequent milestones throughout the year with new features and bug fixes. It is also aligned with the Eclipse Simultaneous Release schedule.
The CFT code repository is hosted on github, and both the main CFT github page, as well as the Eclipse project page for CFT, contain additional information on release schedules as well as how to contribute code and participate in the CFT development.