| |
-
From any perspective, click
File > New > Other > J2EE > Enterprise Application Project
...

-
Enter a name say 'EARProject1', choose a JEE5 server (* At the time of writing we were unable to find any servers that would work with the new facets as they require server adapter plugins in WTP to work with the new facets, we chose an internal test server)as the Target Runtime, Click Next.

-
You can configure Facets here and bind to the runtime. Notice the new facet level 5.0 for creating JEE applications. As well as target it to a Java EE5 server.

-
Hit
Finish.after the wizard finishes, if you are not already in the J2EE
perspective, you will be prompted to switch agree by selecting
'Yes'. In the J2EE perspective you will see the EARProject in the
Project Explorer.
 -
Now choose File > New > Other > EJB > EJB Project.
Enter a name EJBProject1, make sure you add it to the Ear
created in the earlier step.

-
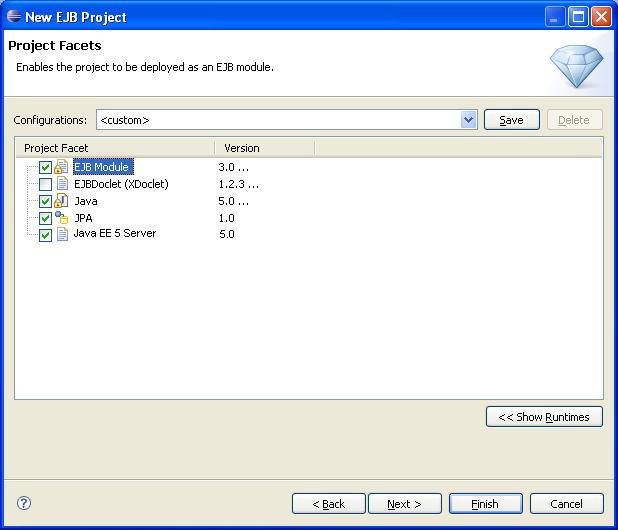
Go to next Page ie the Project Facets page. Here you should see EJB facet version 3.0 selected, also select the JPA facet. Hit Finish.
 -
Now, you should see the modules represented under in the Project Explorer.
-
Go to Window-Preferences-Connectivity-Driver Definitions and add a driver to a relational database to be used in the application.

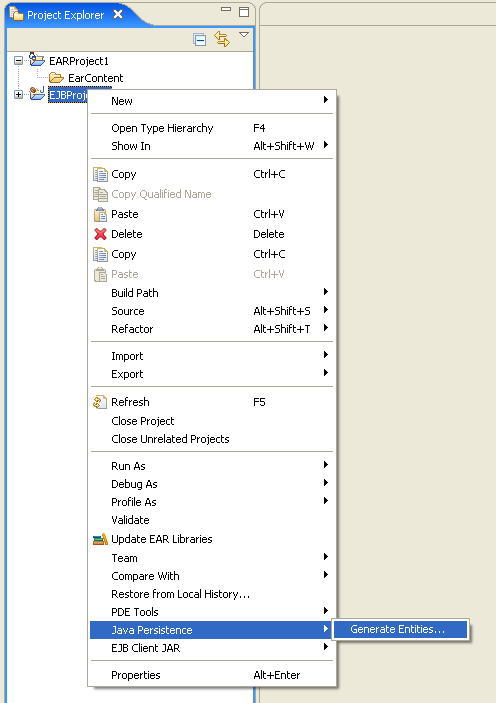
- Right Click on the EJB project and choose Generate Entities
 - That launches the JPA 'Generate Entities' wizard. Add a connection to a sample database. Provide a name and choose the Database driver created earlier. Also provide connection details. (see below)
  - Choose the connection and a schema and go to the next page, here choose a table
 - Hit Finish. This creates an entity bean in the project.
- Now switch to the JPA perspective and open the entity bean in a java editor.
 - As you see you can edit properties of the bean using the JPA details view. I made some changes like specifying explicitly the table,schema, id column (defaults should work fine).
- Now open the file persistence.xml and add the entity bean (* Adding the bean shouldnt be required, I think when we created the bean, the bean class entry should have been added to the file)and the jdbc data source used by the persistence unit.
- <?xml version="1.0" encoding="UTF-8"?>
<persistence version="1.0" xmlns="http://java.sun.com/xml/ns/persistence" xmlns:xsi="http://www.w3.org/2001/XMLSchema-instance" xsi:schemaLocation="http://java.sun.com/xml/ns/persistence http://java.sun.com/xml/ns/persistence/persistence_1_0.xsd">
<persistence-unit name="EJBProject1">
<jta-data-source>jdbc/MyDataSource</jta-data-source>
<class>com.Department</class>
</persistence-unit>
</persistence>
- Now create a dynamic web project (*
choose facet level 2.4 instead of the JEE level 2.5 because our
tools do not work well with the new facet yet) add it to the same
ear. Call it 'WEBProject1'
- Also add the ejb project to the build path of the web project (* we should be able to go to the web project's J2EE module dependencies and add the EJB project there but that does not work yet)
- Create a servlet in the web project.
- Now type the following code in the servlet class.
- @PersistenceUnit(name="EJBProject1")
EntityManagerFactory emf;
/* (non-Java-doc)
* @see javax.servlet.http.HttpServlet#doGet(HttpServletRequest request, HttpServletResponse response)
*/
protected void doGet(HttpServletRequest request, HttpServletResponse response) throws ServletException, IOException {
response.setContentType("text/html");
response.setHeader("Pragma", "No-cache");
response.setDateHeader("Expires", 0);
response.setHeader("Cache-Control", "no-cache");
List depts = emf.createEntityManager().createQuery("select d from Department d").getResultList();
PrintWriter writer = response.getWriter();
for (Iterator iterator = depts.iterator(); iterator.hasNext();) {
Department department = (Department) iterator.next();
writer.print(department.getDeptno());
}
writer.flush();
}
- As you see we are creating a instance variable of type EnitityManagerFactory (injecting is the JEE term), this variable is initialized by the server container at runtime. Using it we can access the entity bean. For example in the above code we have queried the database for all available beans of type Department.
- Save the servlet. Your application is ready.
- Create a datasource on the server with name=jdbc/MyDataSource, Run the application on server (*
We were unable to do that for now as that would have required server
adapters to work with new JEE facets, For now, we think we can write an ant script to generate a ear file out of the projects and deploy it on a server outside WTP)
|
