Creating XML files Tutorial
 

By Ella Belisario
Created August 18, 2004
Updated May 11, 2007


This tutorial demonstrates how you can use XML documents creation wizards that come with the Eclipse Web Tools Platform Project. These wizards allow to create XML document from DTD or XML Schema.


After finishing this tutorial you will be able to do the following:


  • creating an XML file from an XML template
  • creating an XML file from an XML schema
  • creating an XML file from a DTD

Getting Started


In order to work with content of this tutorial you will need to download Web Standard Tools package from wtp downloads.


Once you have downloaded WST and prerequisites, unzip them to the same folder and you are ready to go!


Next, launch Eclipse workbench and select File>New>Examples>XML>Editing and validating XML files to bring up the wizard to create a simple project with the sample XML files.

 
Creating XML files using wizard
 
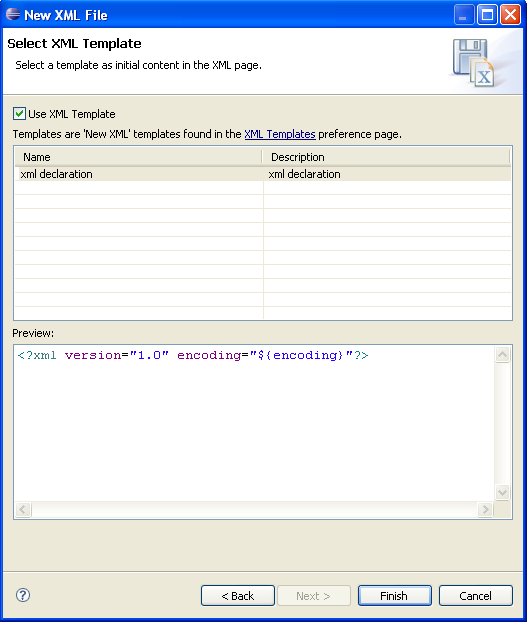
Creating an XML file from an XML template


To create an XML file from a grammar file follow these steps:

 
  1. Invoke New XML File wizard using workbench menu File>New>Other>XML>XML.
  2. On the XML File Name page select a project or folder to contain the XML file and type a name for it.
  3. Next, select the option to Create XML file from an XML template
  4. On the next page, you can select an XML template (Figure 1) to use as initial content in the XML file. The templates shown in the list come from the XML Templates preference page. If you prefer no content, you can uncheck the "Use XML Template" checkbox to generate a blank xml file.
  Figure 1: Selecting an XML template:


Creating an XML file from DTD or XML Schema


Generating an XML file from a DTD or XML Schema can be useful if you want to quickly create an XML file that is based on your gramma file.


To create an XML file from a grammar file follow these steps:

 
  1. Invoke New XML File wizard using workbench menu File>New>Other>XML>XML.
  2. On the XML File Name page select a project or folder to contain the XML file and type a name for it.
  3. Next, depending on what type of gramma file you need choose, select the Create XML file from DTD file or Create XML file from an XML Schema file radio button.
  4. The next choice you have to do is to select your gramma file. You can select it from the workspace (you can import files into the workspace if they are not there) Another possibility is to use DTD and XML files defined in XML Catalog .
  5. On the Select Root Element page select from the following content options:
    • Create optional attributes - both mandatory and optional attributes will be generated.
    • Create optional elements - both mandatory and optional elements will be generated.
    • Create first choice of required choice - the first option of a required choice will be generated in your XML file.
    • Fill elements and attributes with data - any elements and attributes generated will be filled with sample data.

    If you do not select any of these options, then only the minimum amount of content required for the XML file will be created.

  6. The last this is to specify document type (Figure 2) for DTD or namespace (Figure 3) for XML Schema information.

    For DTD:

    • Specify the Public ID or System ID. You do not need to specify both. If you do, the Public ID will be used before the System ID.

    For XML Schema:

    • The Namespace information section contains information about the target namespace of the XML schema, its prefix, and the schema location
  Figure 2: Selecting Root Element page based on DTD file:


  Figure 3: Selecting Root Element page based on XML Schema file:


When wizard finished the XML file will only contain the selected root element and any elements or attributes contained in the root element. You can now add elements, attributes, entities, and notations to the XML file, however, they must follow the rules established in the DTD or XML Schema file that you used to create the XML file.