
Documentation
Compiling and Debugging 4diac FORTE with MS Visual Studio
The following describes how to compile 4diac FORTE with win32-architecture using Visual Studio. In the installation tutorial (back) you find more details on building your own 4diac FORTE. Additionally, other tools are described there.
Attention: If you are using a Visual Studio version older then 2010 you might need to extend it with a stdint.h file. See for example here.
Building a MS Visual Studio Project for 4diac FORTE with CMake
In the installation tutorial, the steps on building a project with CMake are described in detail. To use Visual Studio, you need to however select the tool MS Visual Studio. The correct architecture is Win32.- Open the CMake-GUI.
- Choose the source folder FORTE_FOLDER_ROOT.
- Choose desired destination folder. We recommend FORTE_FOLDER_ROOT/bin/win32.
- Press the button and choose the version of Visual Studio that is used and native default compilers. Press the button afterwards.
- For the option FORTE_ARCHITECTURE, select Win32. Other modules and configurations options can be set following the tutorial step Build a project with CMake.
- Press the button, check red rows and repeat this until no row appears red. Afterwards, press the button .
Compile 4diac FORTE with Visual Studio
- Open the generated 4diac FORTE project (.sln file) with Visual Studio in FORTE_FOLDER_ROOT/bin/win32.
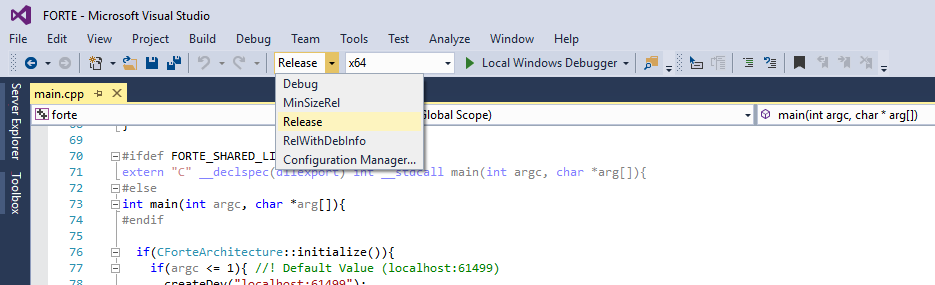
You can change from Debug to Release mode if you don't want to debug.
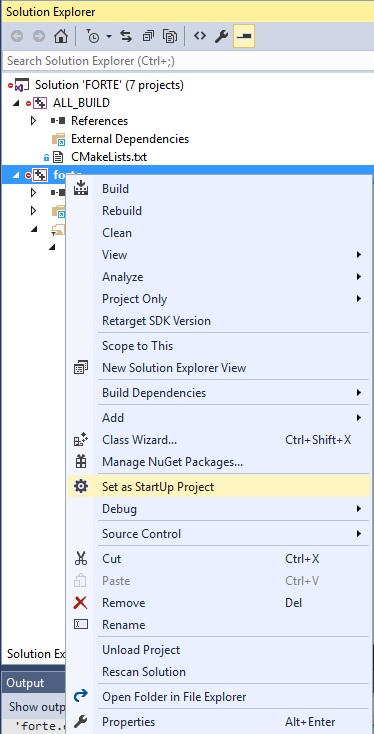
- Build 4diac FORTE afterwards by right-clicking on in the Solution Explorer window and then clicking . A file forte.exe should be generated in FORTE_FOLDER_ROOT/bin/win32/src/Release.

Debugging
- If you want to Debug using Visual Studio, select the Debug mode and set 4diac FORTE as the main project.
- Finally, press or click
Where to go from here?
If you want to build a 4diac FORTE, here is a quick link back:
After you installed all required tools, it's time to start using them. Take a look at the following page:
If you want to go back to the Start Here page, we leave you here a fast access
Or Go to top